Advertisement

Need advices on creating modular environment

Started by April 03, 2020 03:00 PM
2 comments, last by Dawoodoz 4 years, 7 months ago

Hello everyone!
I'm planning pipeline for creating modular environment kits for my game. The style of my game is retrofuturism. So for me it means a lot of large curved shapes. Taking this fact I've faced a question: how should I create textures for my game?

My first decision was to texture everything with trims: walls, floors, roofs and other objects. But I've discovered a problem. Really visible seams across large curved surfaces. To solve this problem I decided to use one half of a trim texture as a simple material with nothing on it (example on picture below).

However I also thought about creating additional material slot on mesh. This slot will carry a simple material, which will be covering large curved surfaces. The rest will be leaved to trim textures. But having two materials on most of the meshes, isn't it expensive?
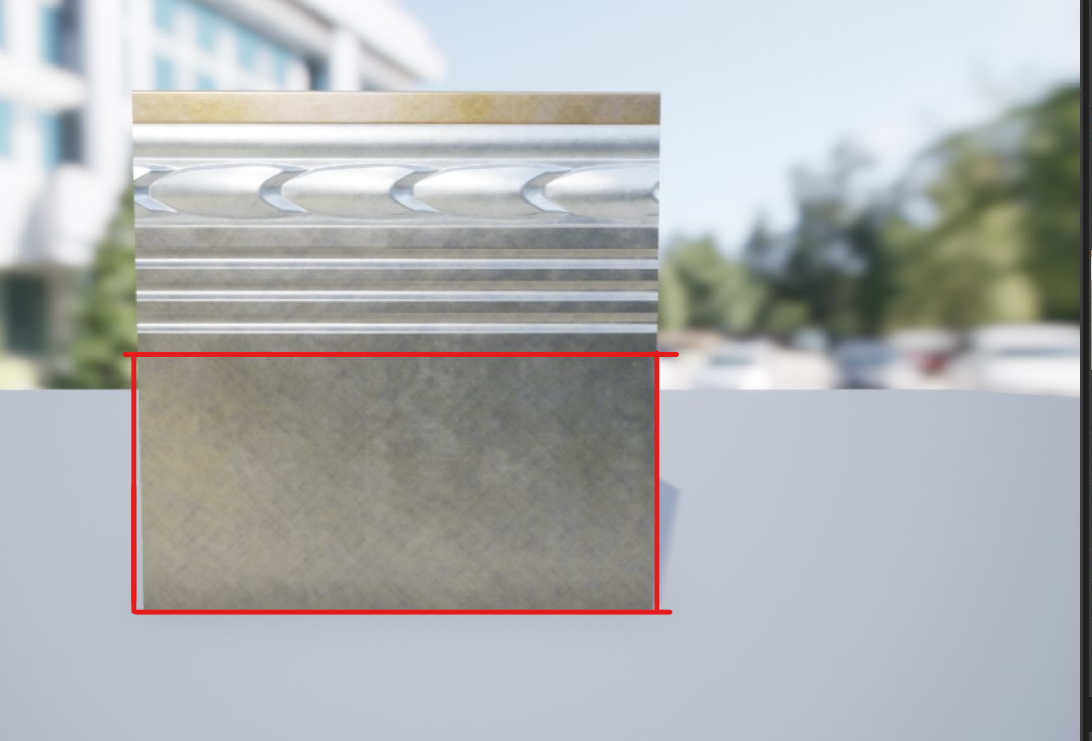
Trim Material. Red square is representing the area, which contains just metal material with no details.
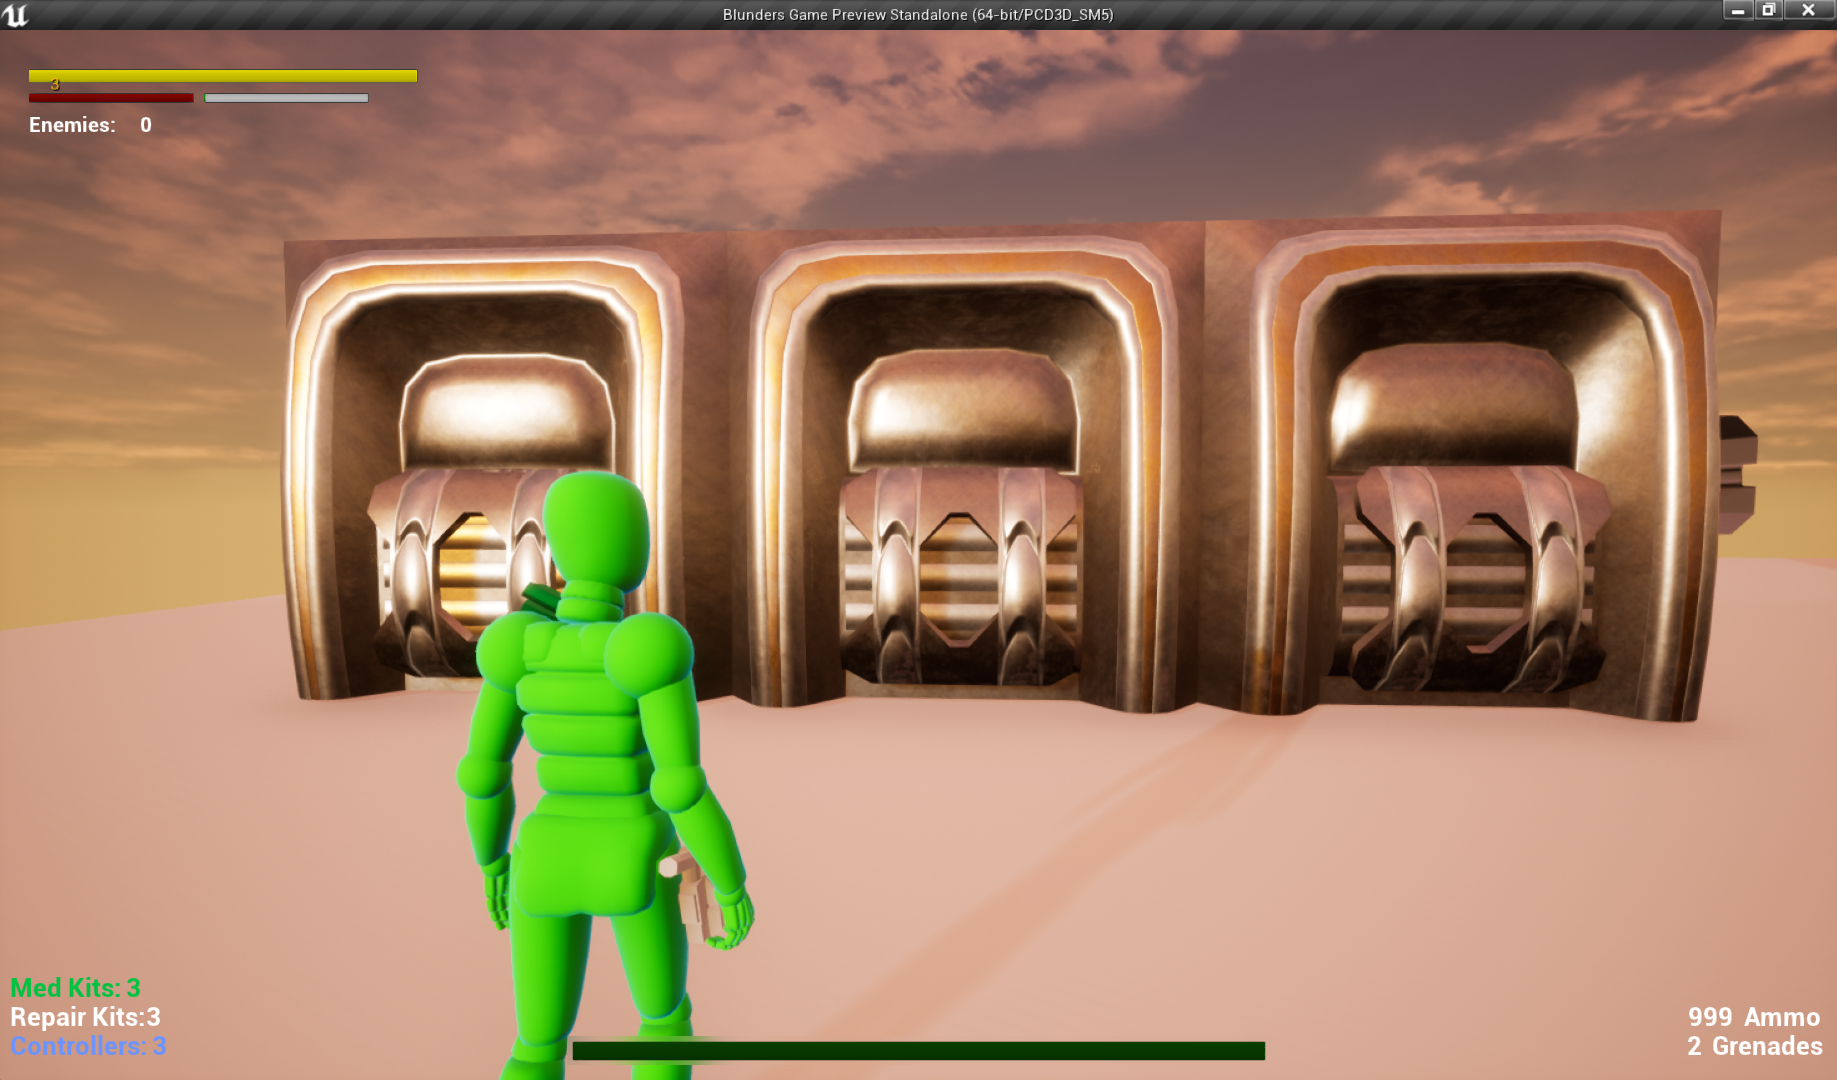
The result. It's quite ugly, because I was making it as fast as possible.

And my question: which method should I use?

  1. Having half of my trim texture wasted on simple material, but having less material slots on meshes.
  2. Having more material slots, but using all space on my trim textures.

Thanks everyone for response!

  • Your “curved” surfaces aren't curved enough: you need more vertices (or some GPU-side tessellation) to make polygonal kinks go away. Example: the arches on the front of the three alcoves.
  • Your shading is implausible, due to a combination of inappropriate material properties, normals, light sources, shadows and occlusion. The brown bulges at the top of the three alcoves should look similar to each other and without a highlighted border (i.e. the preponderant brown material should be much less specular), the shadows in the bottom structures should be softer, and ambient occlusion would be a great improvement (for example, in the spaces between the modules and all other corners).
  • Your texture coordinates in critical locations, such as the edges of the “trim”, might or might not be a little off, but it's hard to judge without better shading.

Omae Wa Mou Shindeiru

Advertisement

The most important thing is to have a texture atlas per model where everything is mapped for fast loading and rendering. Reusing textures for small detail models will make it difficult to adjust the look of the material without messing up other models. Trees, walls, floors, crates, barrels and junk with many variations can however reuse textures because otherwise it would be a waste of memory.

Begin by modeling with catmull-clark subdivision or a high-resolution height map for a round shape. Add many small knobs, screws and cables as models going into textures. Render parts with different materials (metal, rust, dirt, electronics…) and different light features (normals, ambient occlusion…). Mix them together in a photo editor until it looks right for diffuse, specular, self illumination... Then add stains, oil, finger smears and scratches as barely visible layers. The subtle features that only the sub-conscious notice is what adds realism to a texture. Think about the story behind the item when simulating the destruction process. Even things in good condition have a few imperfections.

This topic is closed to new replies.

Advertisement