Frustrated with the clunky support for 3d painting in blender, I've been looking for alternatives. I couldn't get Mari and some others to even run on my lowly PC (intel HD graphics 3000! :lol: ). So in typical 'do everything yourself' style :rolleyes: , I decided to knock something up myself. After all I'm not after anything groundbreaking, just something simple that makes asset creation quicker for my jungle game (small polycounts, small texture sizes).
It has proved easier than I thought so far. Firstly, one thing that helps in quickly building little apps is I have previously written my own cross platform GUI system. The other is that I tend to write as much code as possible in libraries, so that I can reuse it in multiple projects. This was a benefit because I had already written a photoshop-like app, and could reuse some of the code. :ph34r:
It was fairly easy to come up with a simple mesh format, and parse in meshes and UVs from wavefront .obj files. At this stage I'm not really interested in being able to model, and create UV maps, blender has that covered. I'm thinking make the app do one thing, and do it well.
Rendering the model inside the GUI was fairly easy, I have support for 3d sub-windows. And I am using OpenGL 1, just the simple old school, as I have no need for shaders etc. In fact there is not even any lighting yet, just flat shading (easier to see textures).
I was keen to implement a layering system, as that is how photoshop works, and I like it, it is more powerful than trying to do everything on one layer. So I mostly reused my GUI component from my photoshop app, and implemented a simpler system (no groups or adjustment layers) that only supports RGBA 32 bit. I know from experience supporting multiple bit depths is a nightmare. Another thing was I handily could reuse my SSE3 layer blending code. This makes the whole thing faster, as blending is one of the bottlenecks.
The real key to the app was being able to project from drawing on the 3d model to the UV coordinates of the 2d layers. There are several ways of doing this. If I needed to support high poly models I'd probably look at doing this with hardware, but to keep things simple I opted for software methods. I did implement opengl colour ID picking, but didn't need it in the end.
The way I did the projection (probably not the finest way lol :P ) was as well as doing the hardware transform with opengl, I kept track of the matrices, and did a software transform of the mesh too. But not every frame, only when I had the potential to draw on it, so for instance when releasing a mouse button after a rotate. So the normal interaction (rotate etc) is fast, but it hides the slowness of software transform to only when it is needed.
With screen space triangles, it was possible to use a projection method (similar to shadow mapping) to map a screen space brush to the actual uv coordinates of each triangle been drawn. I then draw the brush onto the UV space layer, update the layers to form the final texture, then finally upload the changed area to OpenGL for drawing the frame.
Aside from this there was the matter of hidden surface removal. That is why I briefly looked at OpenGL colour picking (rendering each tri with the ID encoded as a colour, then reading back the picked pixels). Instead I decided to use software methods, as I'm only using low poly models. :wink:
During the software transform, I batch up the triangles into a screen space grid for acceleration. Then identify all possible occluding triangles for each triangle. Then during the draw to the UV layer, for each texel I perform an occlusion test. Sounds slow, but it works pretty fast. Might not work so well for high poly models, but that doesn't matter for me.
There have also been a few other issues to solve, like the need to draw slightly outside triangles to prevent 'bleedover' artefacts on edges. But this is mostly working now:
Here are edge artefacts:
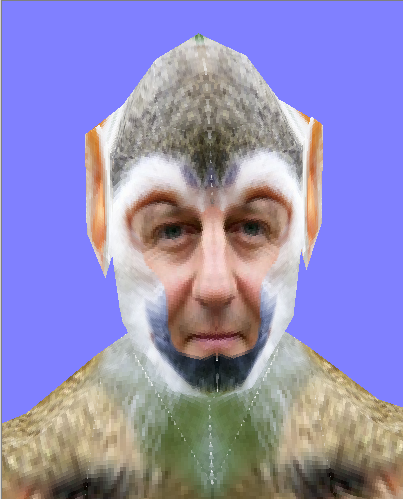
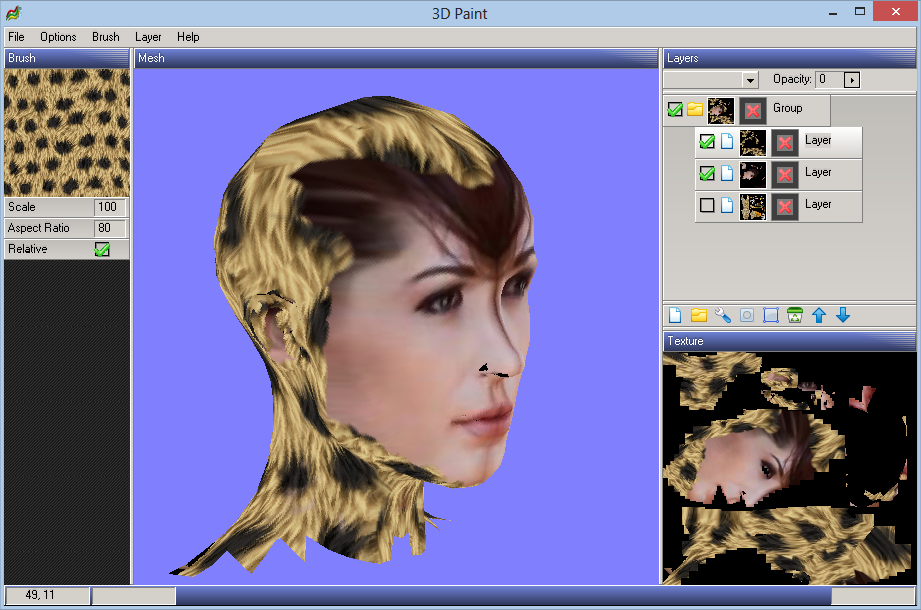
The next stage was the real reason for the app, the ability to draw from reference images directly onto the 3d model. I do this by the brush being 2 things :
An alpha mask (circular brush)
A source texture (may be a reference image)
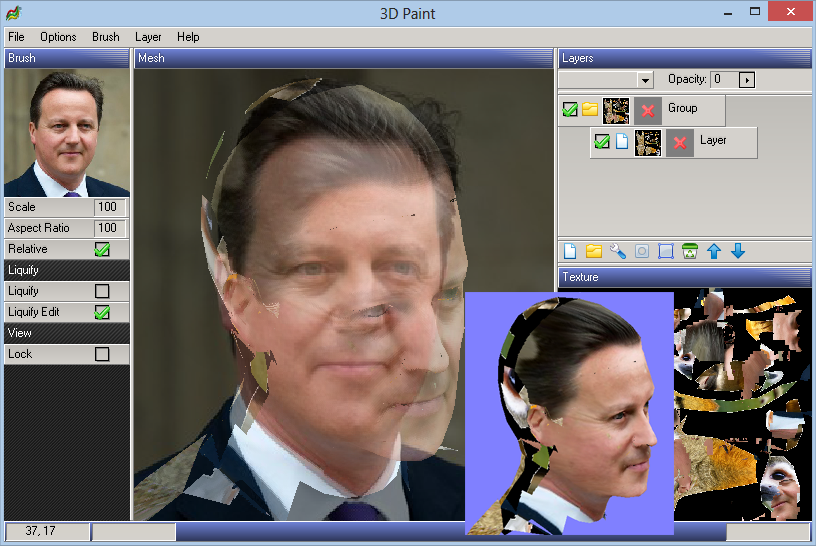
The source image is mapped across the screen, and can be transparently overlayed on the model by holding down shift. Then when you line up the 3d model with the source image, and draw, you project the reference image onto it perfectly, voila! :)
I say perfectly, but there are obviously some things which need addressing. First aspect ratio must match, this is adjustable, and scale. You can't yet rotate the texture, but you will be able to (or rotate the model to suit). The next cool feature is I want to be able to warp the source image to match the model, so if for example, an eye or ear is in the wrong place, you can adjust it. I am doing this with a liquify feature, which I am just getting working.
That is it so far. There's no adjustment of brushes yet, or saving and loading layers, but all that should be pretty simple.
I'm also planning to have both a masking channel for layers, and poly masking, where you can mark out poly zones and only have the layer applied to that zone. And also some stuff to make the layers / brushes blend together better : layer effects like drop shadow, and things like a healing brush (which I wrote already for photoshop app).


