Detecting mobile devices
In general, mobile devices are not as good in performance as desktops and so we'll lower the rendering quality. We'll detect a mobile device with the following function: function detect_mobile() { if( navigator.userAgent.match(/Android/i) || navigator.userAgent.match(/webOS/i) || navigator.userAgent.match(/iPhone/i) || navigator.userAgent.match(/iPad/i) || navigator.userAgent.match(/iPod/i) || navigator.userAgent.match(/BlackBerry/i) || navigator.userAgent.match(/Windows Phone/i)) { return true; } else { return false; } } The init function now looks like this: exports.init = function() { if(detect_mobile()) var quality = m_cfg.P_LOW; else var quality = m_cfg.P_HIGH; m_app.init({ canvas_container_id: "canvas3d", callback: init_cb, physics_enabled: true, quality: quality, show_fps: true, alpha: false, physics_uranium_path: "uranium.js" }); } As we can see, a new initialization parameter - quality - has been added. In the P_LOW profile there are no shadows and post-processing effects. This will allow us to dramatically increase the performance on mobile devices. Controls elements on the HTML page
Lets add the following elements to the HTML file:
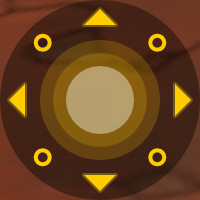
- control_circle element will appear when the screen is touched, and will be used for directing the character.
- The control_tap element is a small marker, following the finger.
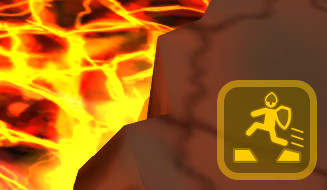
- The control_jump element is a jump button located in the bottom right corner of the screen.
Processing the touch events
Let's look at the callback which is executed at scene load: function load_cb(root) { _character = m_scs.get_first_character(); _character_body = m_scs.get_object_by_empty_name("character", "character_body"); var right_arrow = m_ctl.create_custom_sensor(0); var left_arrow = m_ctl.create_custom_sensor(0); var up_arrow = m_ctl.create_custom_sensor(0); var down_arrow = m_ctl.create_custom_sensor(0); var touch_jump = m_ctl.create_custom_sensor(0); if(detect_mobile()) { document.getElementById("control_jump").style.visibility = "visible"; setup_control_events(right_arrow, up_arrow, left_arrow, down_arrow, touch_jump); } setup_movement(up_arrow, down_arrow); setup_rotation(right_arrow, left_arrow); setup_jumping(touch_jump); setup_camera(); } The new things here are the 5 sensors created with the controls.create_custom_sensor() method. We will change their values when the corresponding touch events are fired. If the detect_mobile() function returns true, the control_jump element is shown up and the setup_control_events() function is called to set up the values for these new sensors (passed as arguments). This function is quite large and we'll look at it step-by-step. var touch_start_pos = new Float32Array(2); var move_touch_idx; var jump_touch_idx; var tap_elem = document.getElementById("control_tap"); var control_elem = document.getElementById("control_circle"); var tap_elem_offset = tap_elem.clientWidth / 2; var ctrl_elem_offset = control_elem.clientWidth / 2; First of all the variables are declared for saving the touch point and the touch indices, which correspond to the character's moving and jumping. The tap_elem and control_elem HTML elements are required in several callbacks. The touch_start_cb() callback
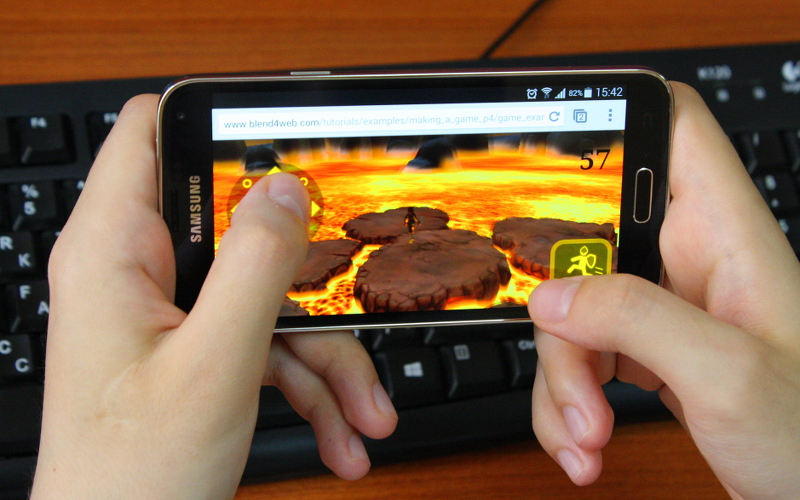
In this function the beginning of a touch event is processed. function touch_start_cb(event) { event.preventDefault(); var h = window.innerHeight; var w = window.innerWidth; var touches = event.changedTouches; for (var i = 0; i < touches.length; i++) { var touch = touches; var x = touch.clientX; var y = touch.clientY; if (x > w / 2) // right side of the screen break; touch_start_pos[0] = x; touch_start_pos[1] = y; move_touch_idx = touch.identifier; tap_elem.style.visibility = "visible"; tap_elem.style.left = x - tap_elem_offset + "px"; tap_elem.style.top = y - tap_elem_offset + "px"; control_elem.style.visibility = "visible"; control_elem.style.left = x - ctrl_elem_offset + "px"; control_elem.style.top = y - ctrl_elem_offset + "px"; } } Here we iterate through all the changed touches of the event (event.changedTouches) and discard the touches from the right half of the screen: if (x > w / 2) // right side of the screen break; If this condition is met, we save the touch point touch_start_pos and the index of this touch move_touch_idx. After that we'll render 2 elements in the touch point: control_tap and control_circle. This will look on the device screen as follows: 
The touch_jump_cb() callback
function touch_jump_cb (event) { event.preventDefault(); var touches = event.changedTouches; for (var i = 0; i < touches.length; i++) { var touch = touches; m_ctl.set_custom_sensor(jump, 1); jump_touch_idx = touch.identifier; } } This callback is called when the control_jump button is touched 
The touch_move_cb() callback
This function is very similar to the touch_start_cb() function. It processes finger movements on the screen. function touch_move_cb(event) { event.preventDefault(); m_ctl.set_custom_sensor(up_arrow, 0); m_ctl.set_custom_sensor(down_arrow, 0); m_ctl.set_custom_sensor(left_arrow, 0); m_ctl.set_custom_sensor(right_arrow, 0); var h = window.innerHeight; var w = window.innerWidth; var touches = event.changedTouches; for (var i=0; i < touches.length; i++) { var touch = touches; var x = touch.clientX; var y = touch.clientY; if (x > w / 2) // right side of the screen break; tap_elem.style.left = x - tap_elem_offset + "px"; tap_elem.style.top = y - tap_elem_offset + "px"; var d_x = x - touch_start_pos[0]; var d_y = y - touch_start_pos[1]; var r = Math.sqrt(d_x * d_x + d_y * d_y); if (r < 16) // don't move if control is too close to the center break; var cos = d_x / r; var sin = -d_y / r; if (cos > Math.cos(3 * Math.PI / 8)) m_ctl.set_custom_sensor(right_arrow, 1); else if (cos < -Math.cos(3 * Math.PI / 8)) m_ctl.set_custom_sensor(left_arrow, 1); if (sin > Math.sin(Math.PI / 8)) m_ctl.set_custom_sensor(up_arrow, 1); else if (sin < -Math.sin(Math.PI / 8)) m_ctl.set_custom_sensor(down_arrow, 1); } } The values of d_x and d_y denote by how much the marker is shifted relative to the point in which the touch started. From these increments the distance to this point is calculated, as well as the cosine and sine of the direction angle. This data fully defines the required behavior depending on the finger position by means of simple trigonometric transformations. As a result the ring is divided into 8 parts, for which their own sets of sensors are assigned: right_arrow, left_arrow, up_arrow, down_arrow. The touch_end_cb() callback
This callback resets the sensors' values and the saved touch indices. function touch_end_cb(event) { event.preventDefault(); var touches = event.changedTouches; for (var i=0; i < touches.length; i++) { if (touches.identifier == move_touch_idx) { m_ctl.set_custom_sensor(up_arrow, 0); m_ctl.set_custom_sensor(down_arrow, 0); m_ctl.set_custom_sensor(left_arrow, 0); m_ctl.set_custom_sensor(right_arrow, 0); move_touch_idx = null; tap_elem.style.visibility = "hidden"; control_elem.style.visibility = "hidden"; } else if (touches.identifier == jump_touch_idx) { m_ctl.set_custom_sensor(jump, 0); jump_touch_idx = null; } } } Also for the move event the corresponding control elements become hidden: tap_elem.style.visibility = "hidden"; control_elem.style.visibility = "hidden"; 
Setting up the callbacks for the touch events
And the last thing happening in the setup_control_events() function is setting up the callbacks for the corresponding touch events: document.getElementById("canvas3d").addEventListener("touchstart", touch_start_cb, false); document.getElementById("control_jump").addEventListener("touchstart", touch_jump_cb, false); document.getElementById("canvas3d").addEventListener("touchmove", touch_move_cb, false); document.getElementById("canvas3d").addEventListener("touchend", touch_end_cb, false); document.getElementById("controls").addEventListener("touchend", touch_end_cb, false); Please note that the touchend event is listened for two HTML elements. That is because the user can release his/her finger both inside and outside of the controls element. Now we have finished working with events. Including the touch sensors into the system of controls
Now we only have to add the created sensors to the existing system of controls. Let's check out the changes using the setup_movement() function as an example. function setup_movement(up_arrow, down_arrow) { var key_w = m_ctl.create_keyboard_sensor(m_ctl.KEY_W); var key_s = m_ctl.create_keyboard_sensor(m_ctl.KEY_S); var key_up = m_ctl.create_keyboard_sensor(m_ctl.KEY_UP); var key_down = m_ctl.create_keyboard_sensor(m_ctl.KEY_DOWN); var move_array = [ key_w, key_up, up_arrow, key_s, key_down, down_arrow ]; var forward_logic = function(s){return (s[0] || s[1] || s[2])}; var backward_logic = function(s){return (s[3] || s[4] || s[5])}; function move_cb(obj, id, pulse) { if (pulse == 1) { switch(id) { case "FORWARD": var move_dir = 1; m_anim.apply(_character_body, "character_run_B4W_BAKED"); break; case "BACKWARD": var move_dir = -1; m_anim.apply(_character_body, "character_run_B4W_BAKED"); break; } } else { var move_dir = 0; m_anim.apply(_character_body, "character_idle_01_B4W_BAKED"); } m_phy.set_character_move_dir(obj, move_dir, 0); m_anim.play(_character_body); m_anim.set_behavior(_character_body, m_anim.AB_CYCLIC); }; m_ctl.create_sensor_manifold(_character, "FORWARD", m_ctl.CT_TRIGGER, move_array, forward_logic, move_cb); m_ctl.create_sensor_manifold(_character, "BACKWARD", m_ctl.CT_TRIGGER, move_array, backward_logic, move_cb); m_anim.apply(_character_body, "character_idle_01_B4W_BAKED"); m_anim.play(_character_body); m_anim.set_behavior(_character_body, m_anim.AB_CYCLIC); } As we can see, the only changed things are the set of sensors in the move_array and inside the forward_logic() and backward_logic() logic functions, which now depend on the touch sensors as well. The setup_rotation() and setup_jumping() functions have changed in a similar way. They are listed below: function setup_rotation(right_arrow, left_arrow) { var key_a = m_ctl.create_keyboard_sensor(m_ctl.KEY_A); var key_d = m_ctl.create_keyboard_sensor(m_ctl.KEY_D); var key_left = m_ctl.create_keyboard_sensor(m_ctl.KEY_LEFT); var key_right = m_ctl.create_keyboard_sensor(m_ctl.KEY_RIGHT); var elapsed_sensor = m_ctl.create_elapsed_sensor(); var rotate_array = [ key_a, key_left, left_arrow, key_d, key_right, right_arrow, elapsed_sensor, ]; var left_logic = function(s){return (s[0] || s[1] || s[2])}; var right_logic = function(s){return (s[3] || s[4] || s[5])}; function rotate_cb(obj, id, pulse) { var elapsed = m_ctl.get_sensor_value(obj, "LEFT", 6); if (pulse == 1) { switch(id) { case "LEFT": m_phy.character_rotation_inc(obj, elapsed * ROT_SPEED, 0); break; case "RIGHT": m_phy.character_rotation_inc(obj, -elapsed * ROT_SPEED, 0); break; } } } m_ctl.create_sensor_manifold(_character, "LEFT", m_ctl.CT_CONTINUOUS, rotate_array, left_logic, rotate_cb); m_ctl.create_sensor_manifold(_character, "RIGHT", m_ctl.CT_CONTINUOUS, rotate_array, right_logic, rotate_cb); } function setup_jumping(touch_jump) { var key_space = m_ctl.create_keyboard_sensor(m_ctl.KEY_SPACE); var jump_cb = function(obj, id, pulse) { if (pulse == 1) { m_phy.character_jump(obj); } } m_ctl.create_sensor_manifold(_character, "JUMP", m_ctl.CT_TRIGGER, [key_space, touch_jump], function(s){return s[0] || s[1]}, jump_cb); } And the camera again
In the end let's return to the camera. Keeping in mind the community feedback, we've introduced the possibility to tweak the stiffness of the camera constraint. Now this function call is as follows: m_cons.append_semi_soft_cam(camera, _character, CAM_OFFSET, CAM_SOFTNESS); The CAM_SOFTNESS constant is defined in the beginning of the file and its value is 0.2. Conclusion
At this stage, programming the controls for mobile devices is finished. In the next tutorials we'll implement the gameplay and look at some other features of the Blend4Web physics engine. Link to the standalone applicationThe source files of the application and the scene are part of the free Blend4Web SDK distribution.


As with the rest of the series, this is a great article. I've enjoyed the entire series so far.