Advertisement

A carbon copy of a crossroads from Google Maps

Started by January 19, 2018 11:13 AM
13 comments, last by cubr 6 years, 10 months ago

Hey,

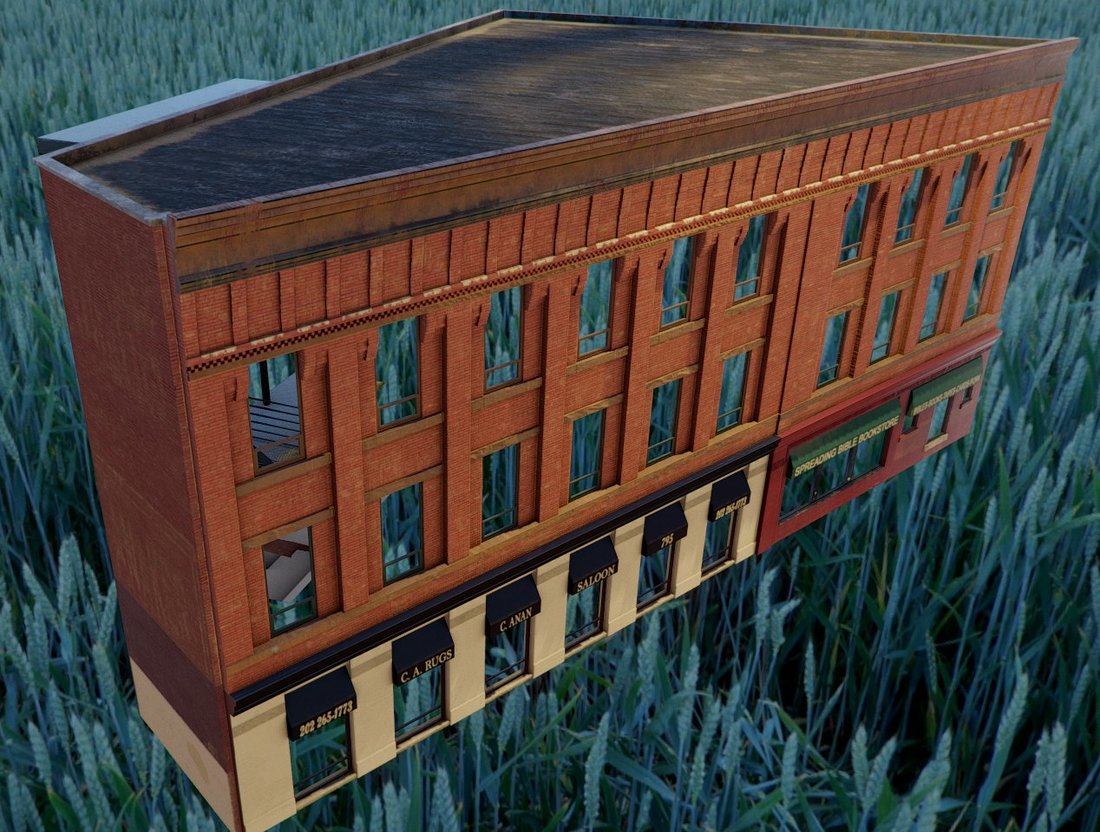
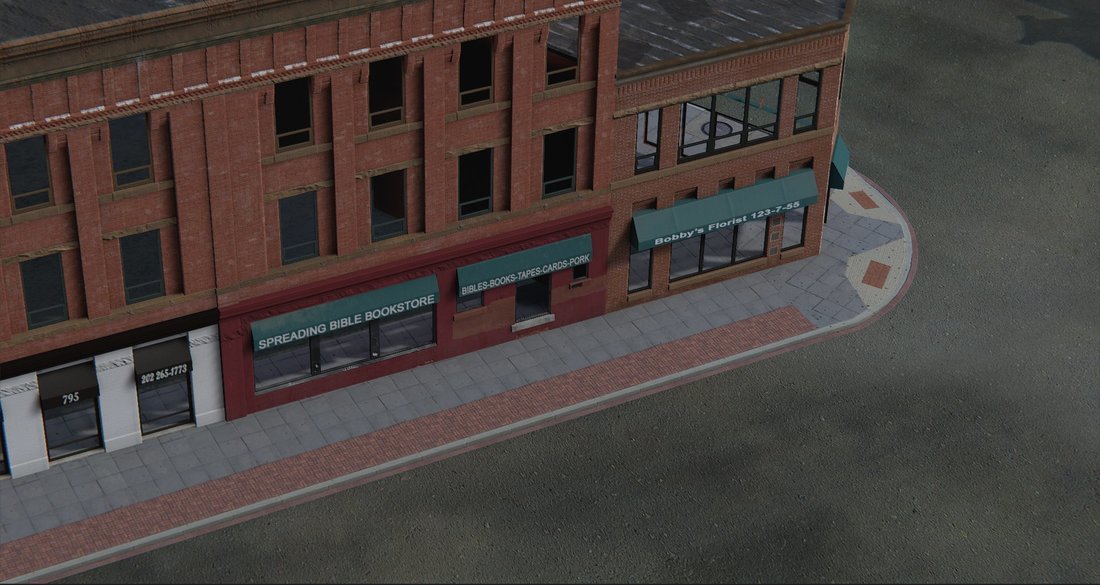
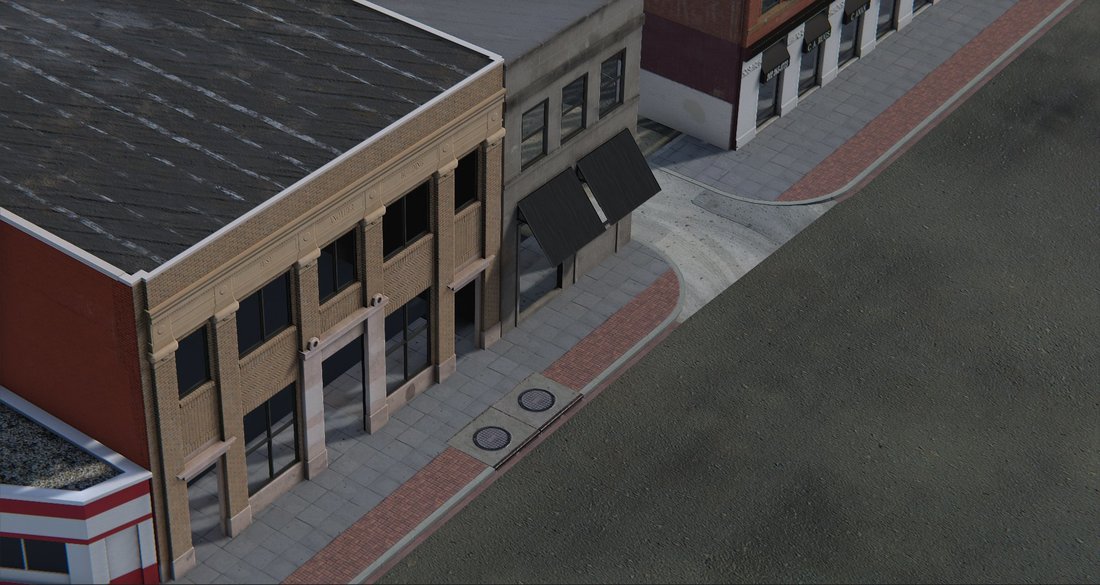
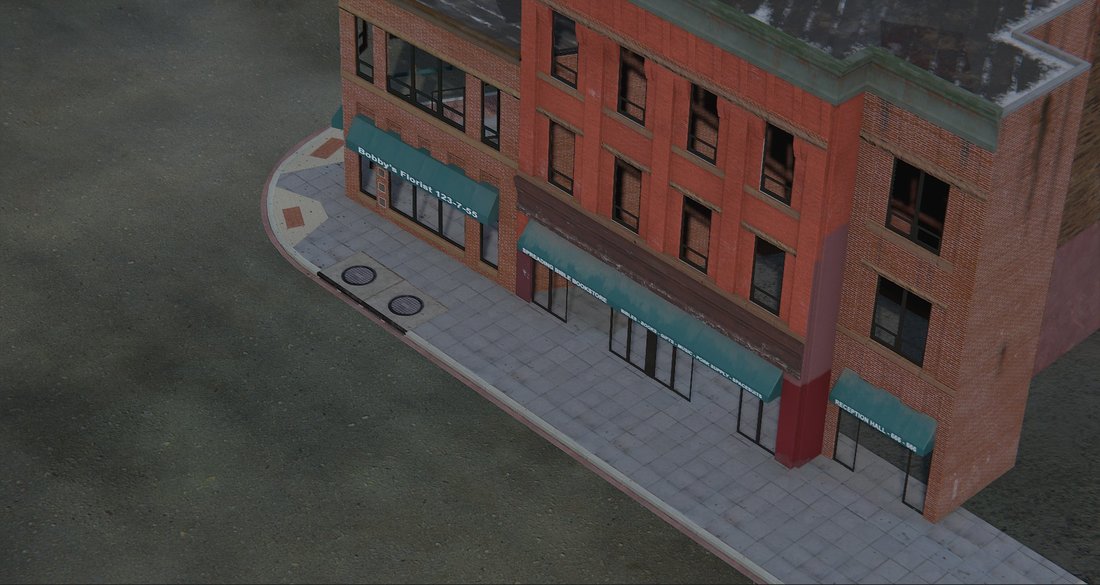
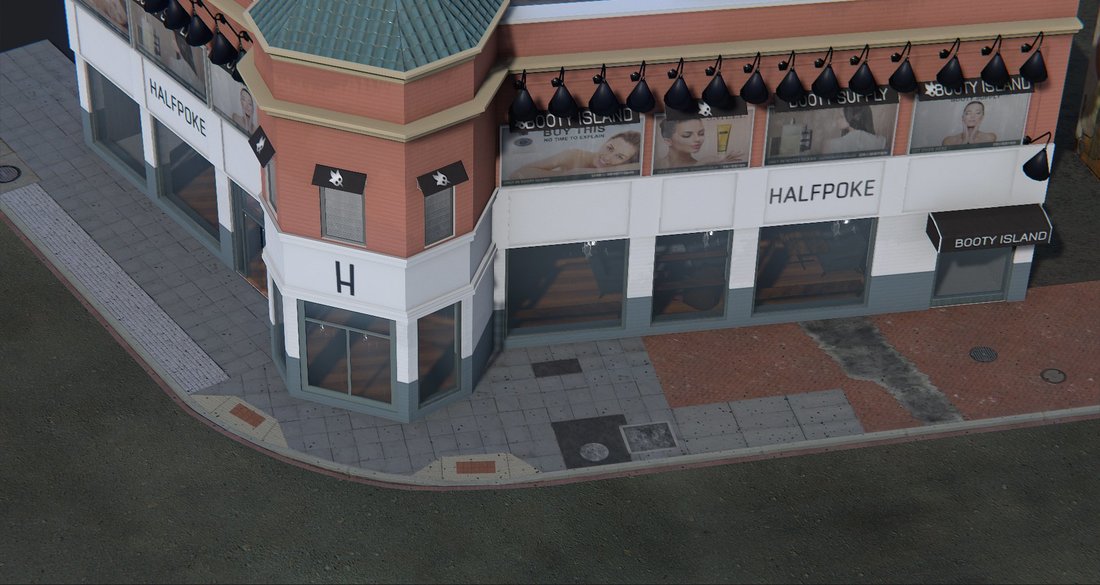
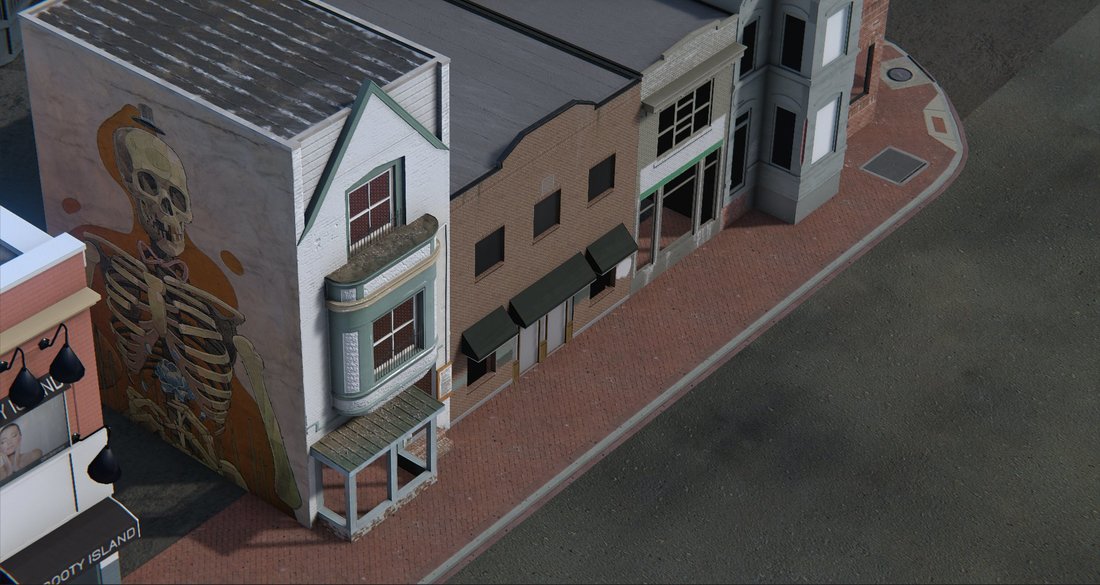
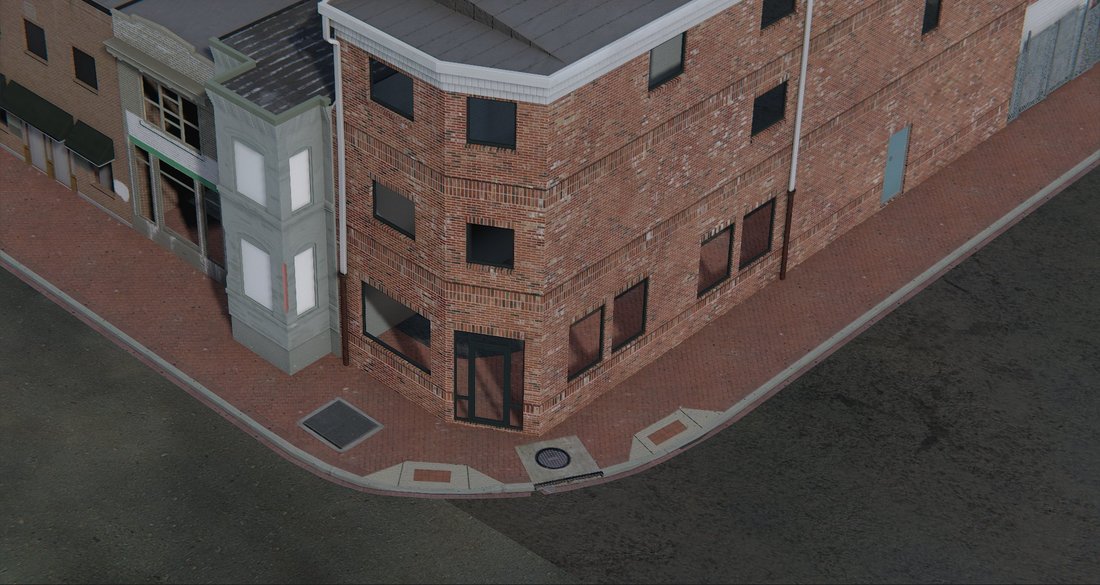
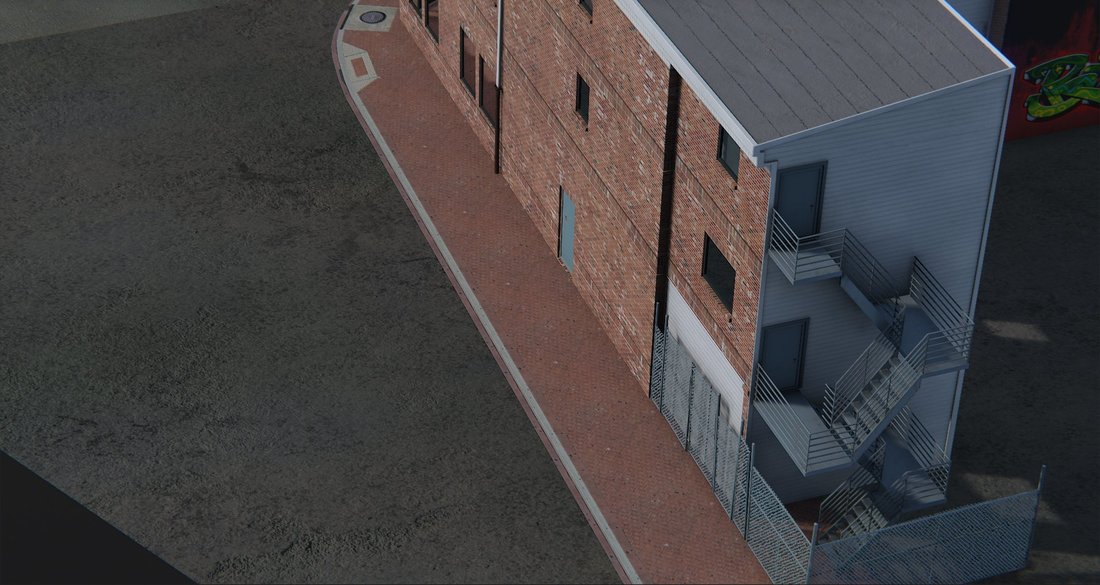
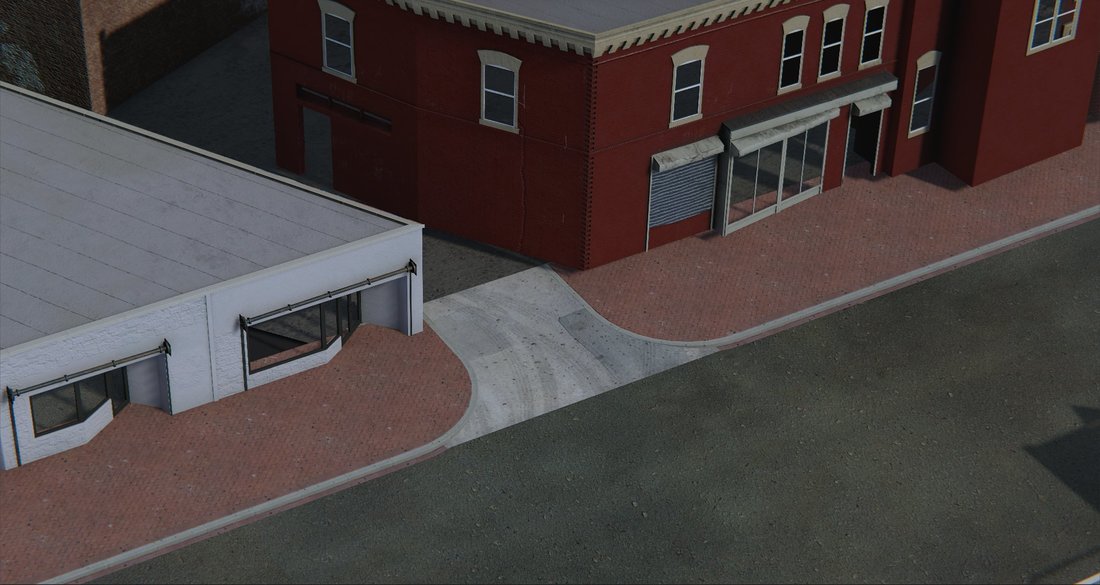
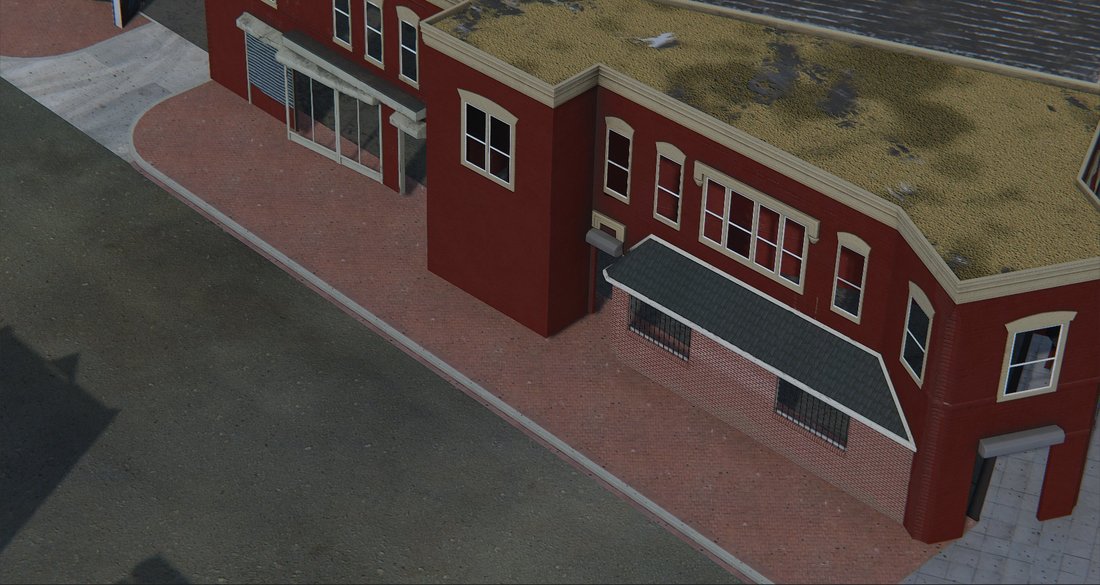
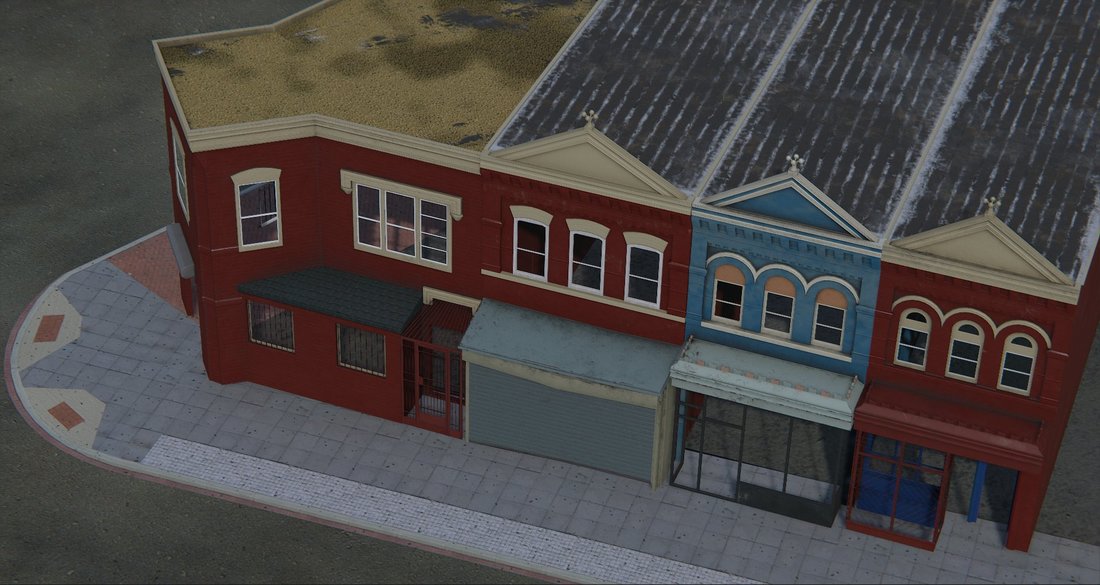
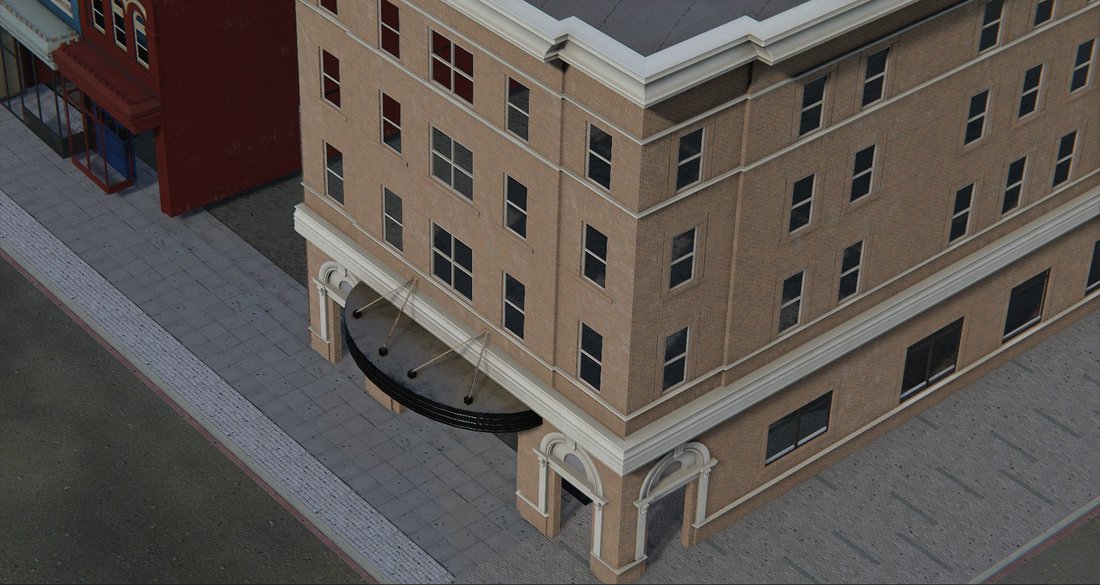
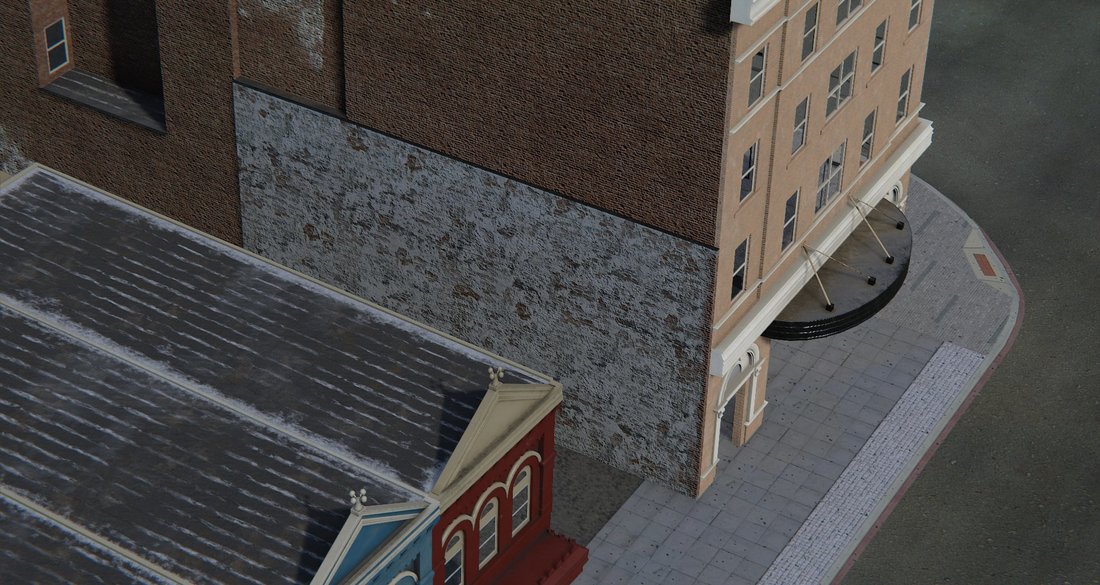
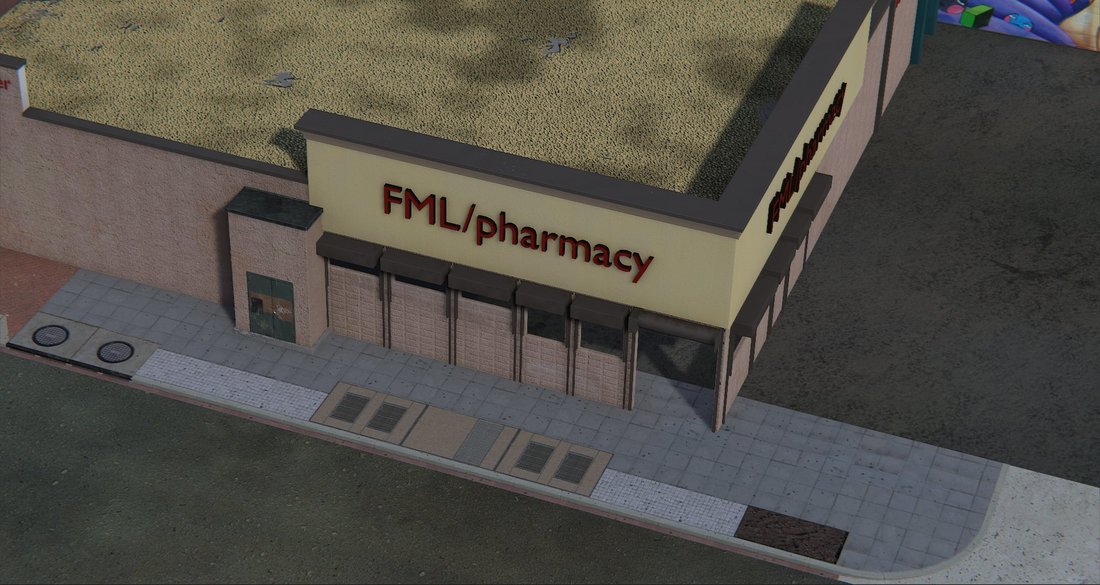
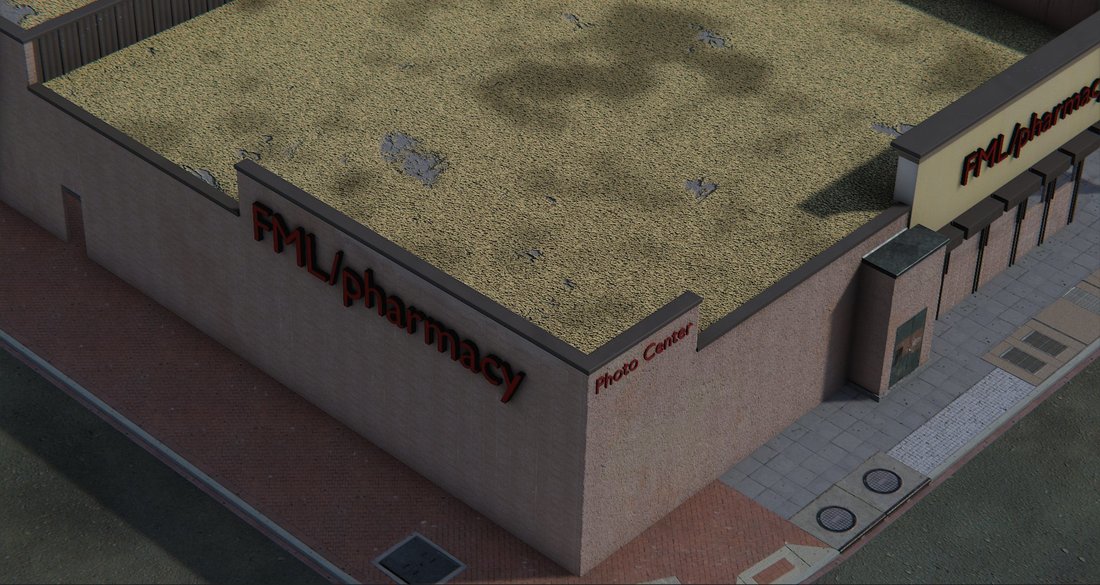
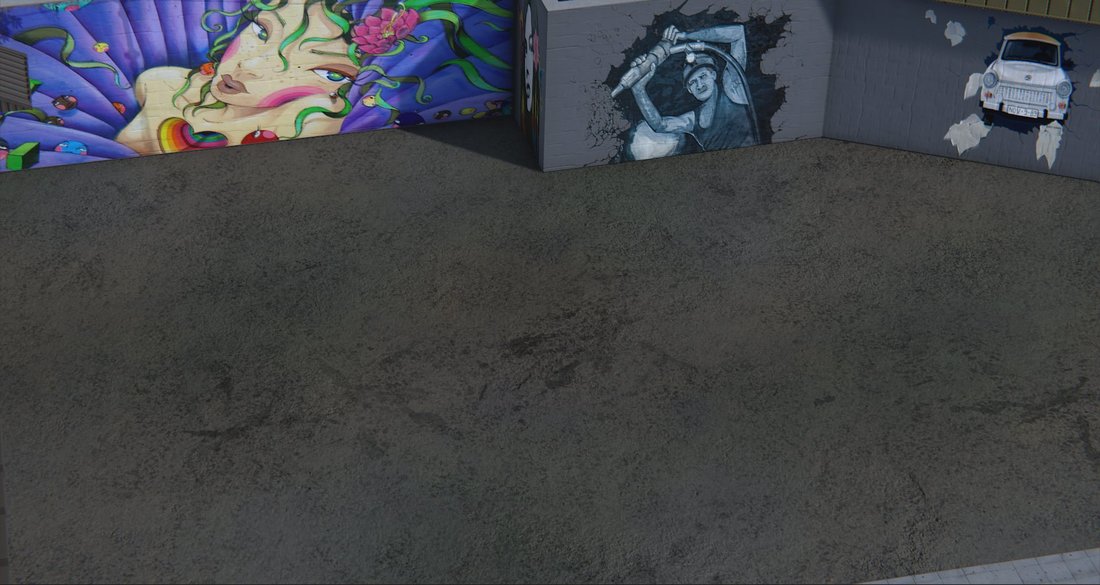
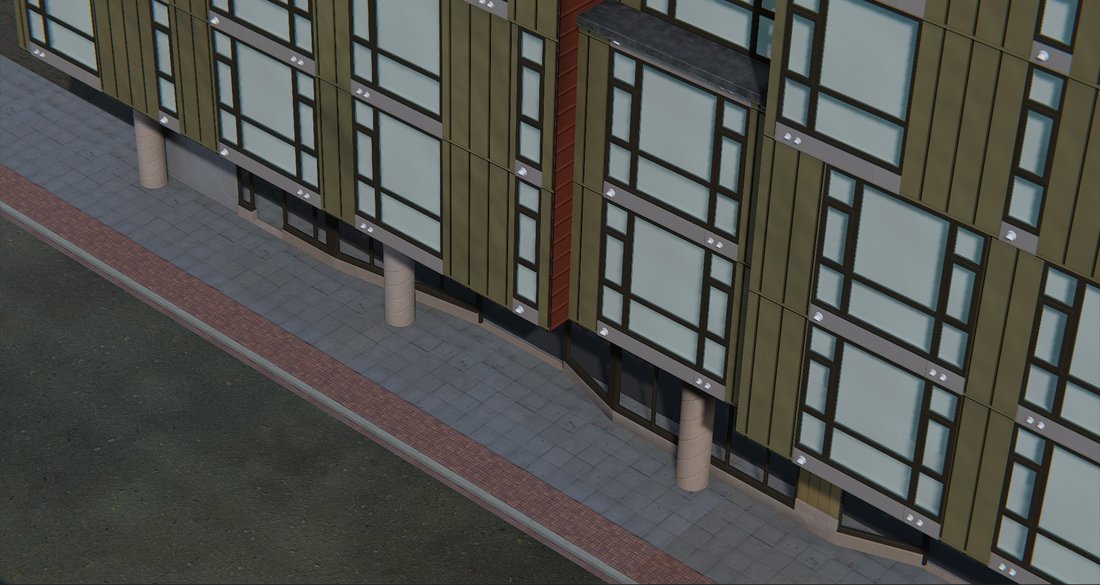
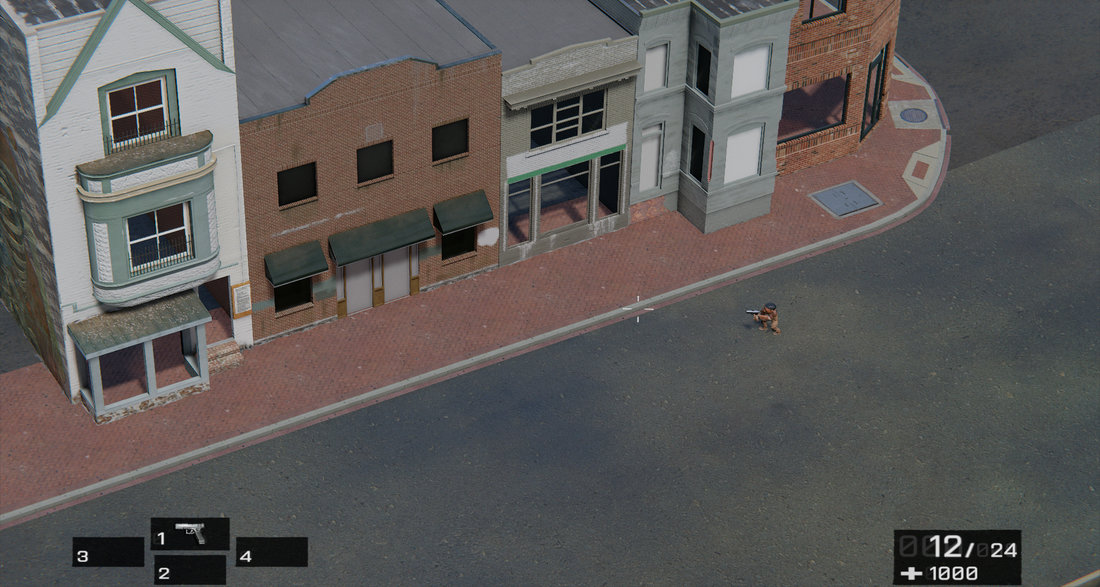
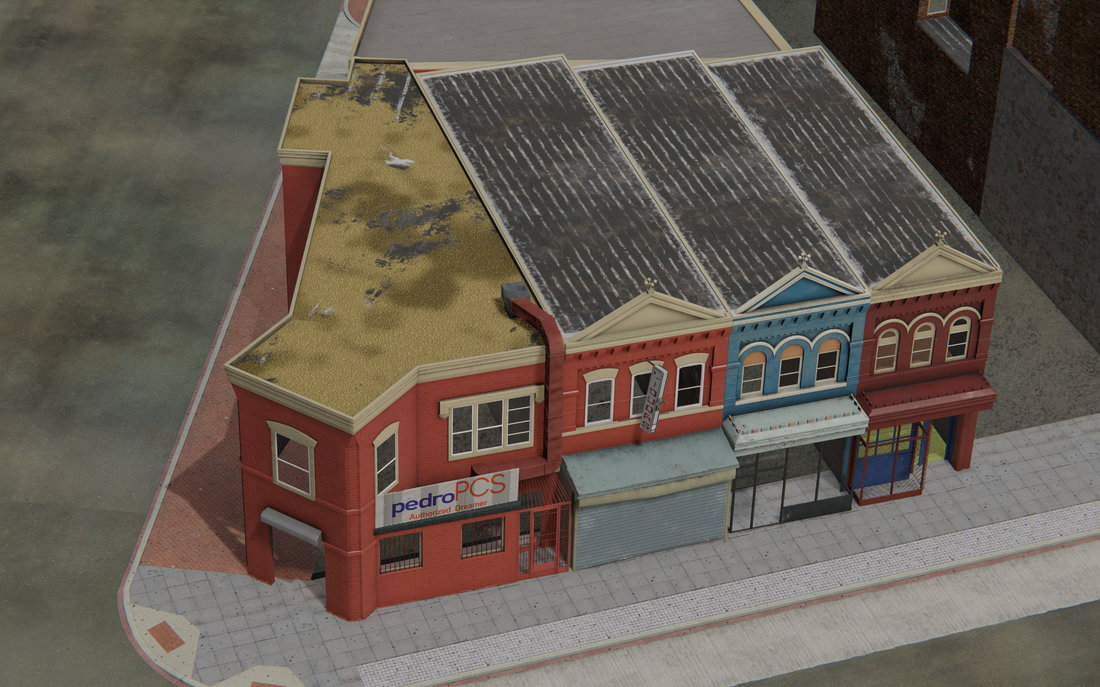
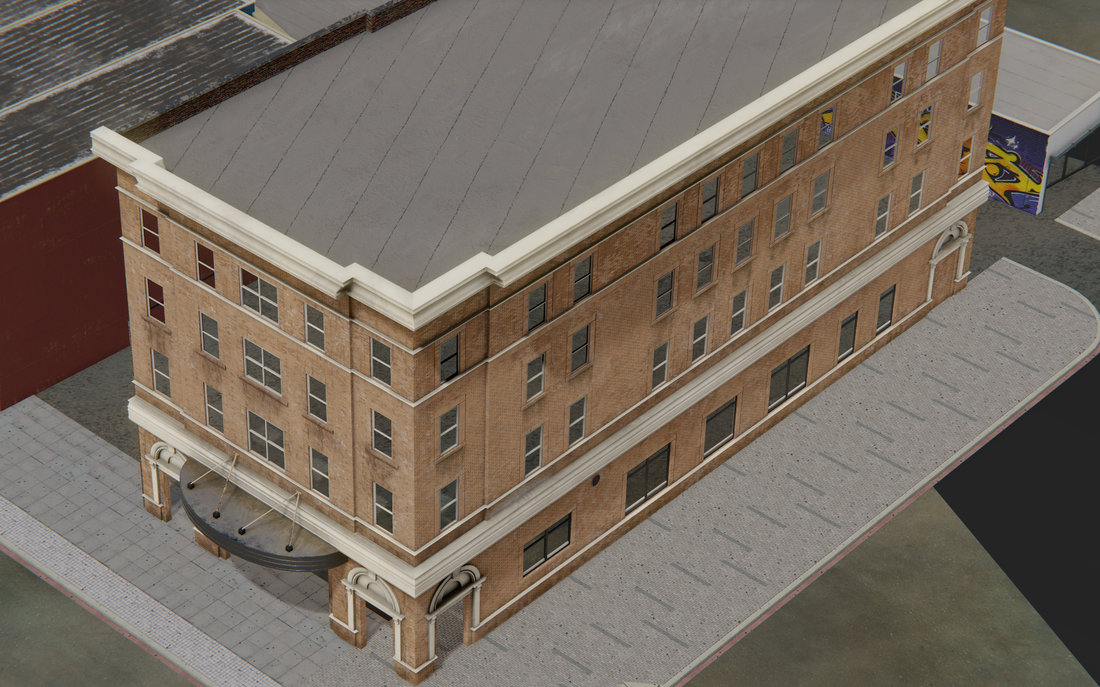
I'm an amateur game designer. For the test level of my game, I decided to create a carbon copy of a crossroads from Google Maps (due to a complete lack of imagination, obv.). The problem was - I had zero modeling or texturing experience. But that did not stop me, I picked Blender as the modeling software and Substance Painter as the texturing one and learning-while-creating in 8 months I ended up here:

The crossroads:
https://www.google.com.ua/maps/@38.9163424,-77.0220187,3a,75y,348.12h,88.25t/data=!3m6!1e1!3m4!1s1R-P0RhbdBywAMboPkAszQ!2e0!7i13312!8i6656

Make sure you are watching 2016's pictures, cuz those were the ones I used.

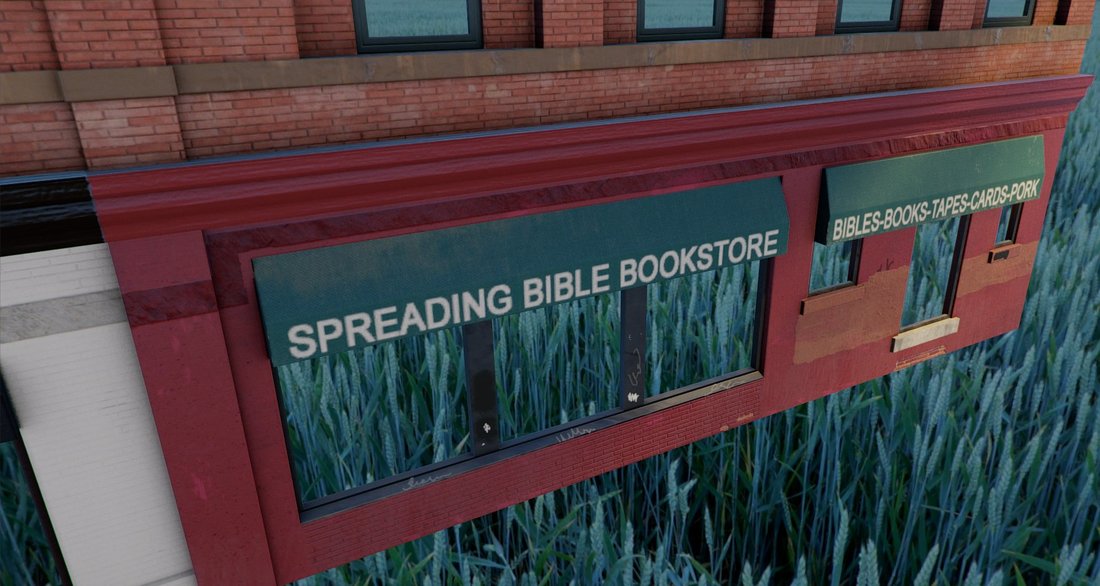
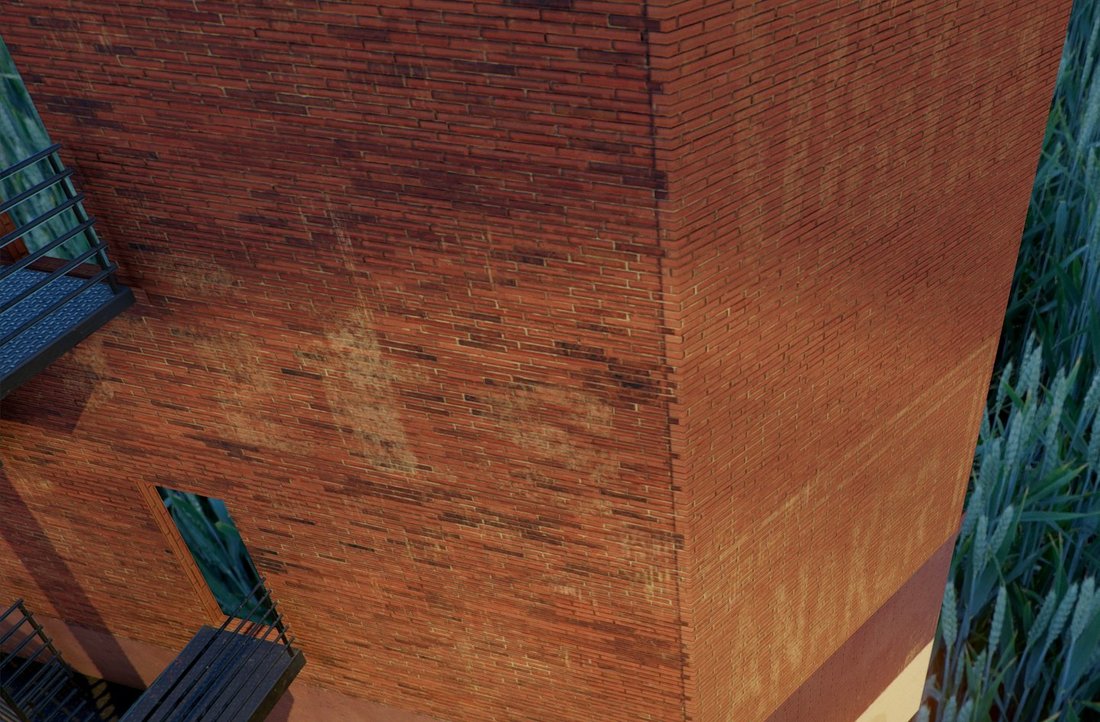
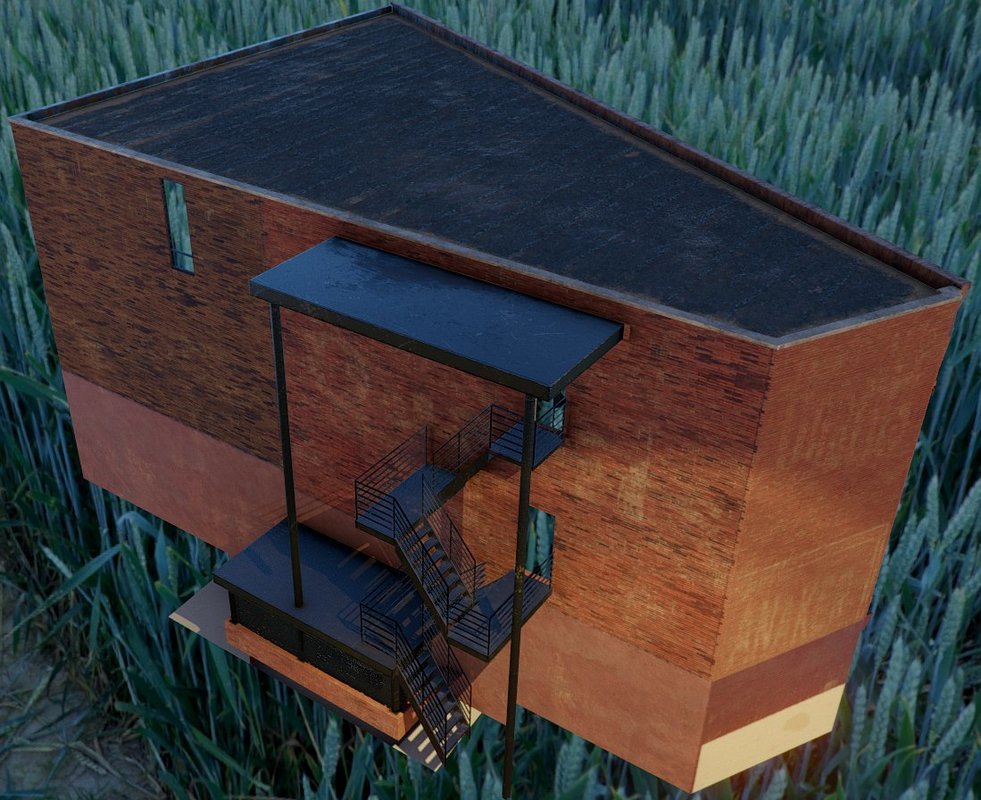
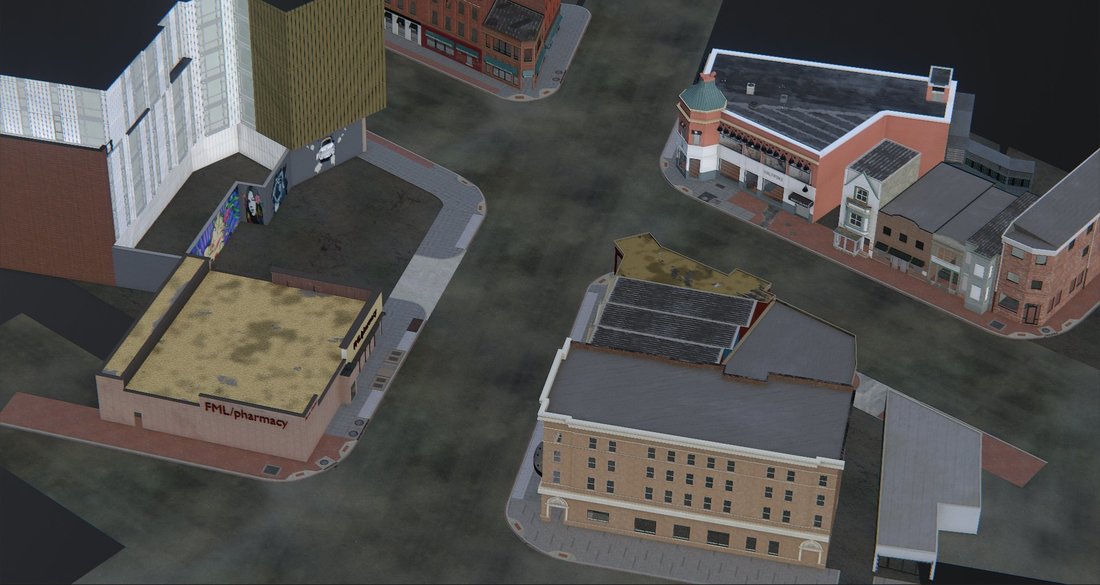
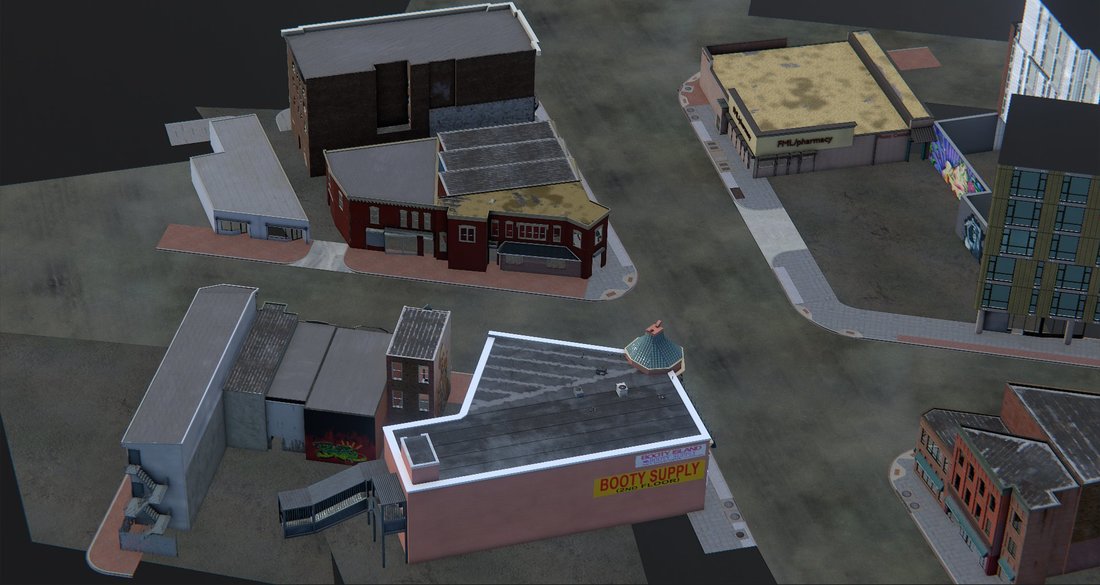
The copy:

_1.thumb.jpg.fd3be6621f5bea6037409773a53e1ec9.jpg

_7.thumb.jpg.29f74c41cd1069fcb80355360ac622bc.jpg

_8.thumb.jpg.6b1d3caffade543c739f5e6c1ce0047a.jpg

_9.thumb.jpg.d722a27e055b764d81f2e16b45ddcfa2.jpg

1.thumb.jpg.3c77c09290eaea21097dd3c12a52f129.jpg

2.thumb.jpg.ee1f57ce33db06fad31f7fe25a8efa18.jpg

3.thumb.jpg.26d341846726bac78e320f2c660ac0ed.jpg

4.thumb.jpg.13ac4ef02c59a2d045035cc7a23f1fe5.jpg

5.thumb.jpg.fcbfd427c61b2730b1ed1d3793c74227.jpg

6.thumb.jpg.ce2c14db88a6f6a0f932c508255d542a.jpg

7.thumb.jpg.1da5fad5432482eba41a05aa79985f82.jpg

8.thumb.jpg.be375a0d0ce70a3396559041d731ec79.jpg

9.thumb.jpg.6eae72a47f987c6f164431948ef9844e.jpg

10.thumb.jpg.e39149fdb81f0646d9df89b583e39c4e.jpg

11.thumb.jpg.f6640cadbe48eb5da74976074893a071.jpg

12.thumb.jpg.929d23123e67d5d1bb1b85bf99d071c3.jpg

13.thumb.jpg.c4f9883c51d3d1ef7b31751293a3b524.jpg

14.thumb.jpg.f9d5e7d0cf9b82fa96935f02f1bf5aec.jpg

15.thumb.jpg.9a96e5272368a82f4ec7fb31c88ce899.jpg

16.thumb.jpg.a2e84022c5c079f52dce694555e72688.jpg

17.thumb.jpg.a72aa298e56360dc6bfce72d832fa55e.jpg

18.thumb.jpg.e01de4a0c6c4e45b1c2373865028eff5.jpg

19.thumb.jpg.73b04474c7b101b00af9c4c36e260dde.jpg

20.thumb.jpg.3d94afb4b8ddc07055c7daabc6af133b.jpg

21.thumb.jpg.e1e65fbe8fb2c44b8386e7db070272d4.jpg

22.thumb.jpg.be66115311aecfd0f2d2dd8b4e3fe972.jpg


Please keep in mind, that these models are designed for a top-down view game, not a first person game - that is the reason behind lack of resolution in some places. The other thing is, some models were rushed and have little details - they will be fixed in the future.

You can see the progress of my learning by studying the "Halfpoke" building, which was the first one I made - next to no details, hard edges everywhere, etc. On the other hand, the building with the skeleton graffiti was one of the latter ones I made and despite looking simple, has quite intricate details.

The screenshots were rendered in real time with Unity as I don't plan on adding these to a portfolio.


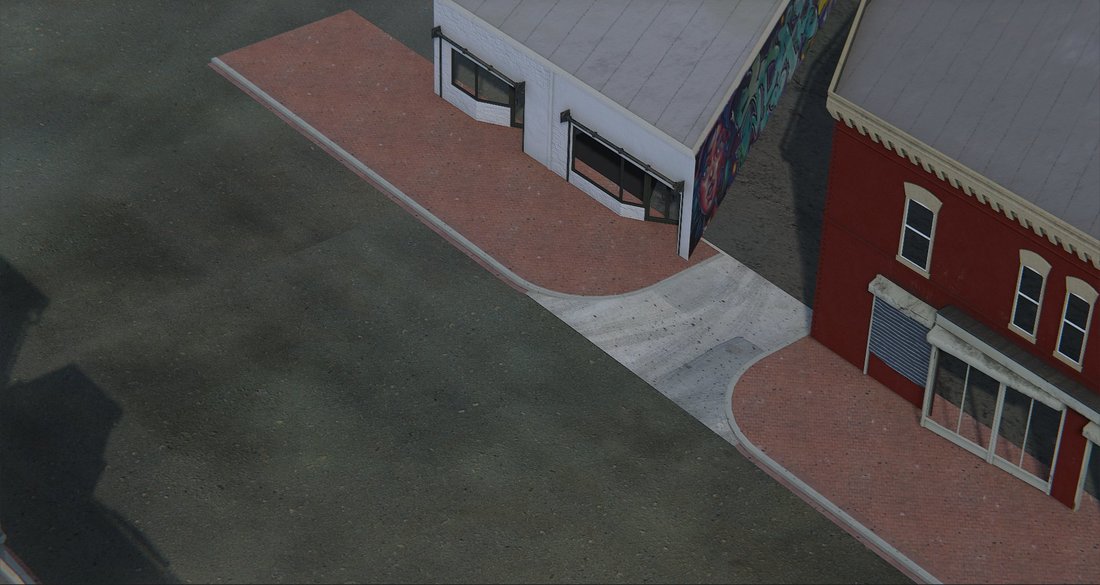
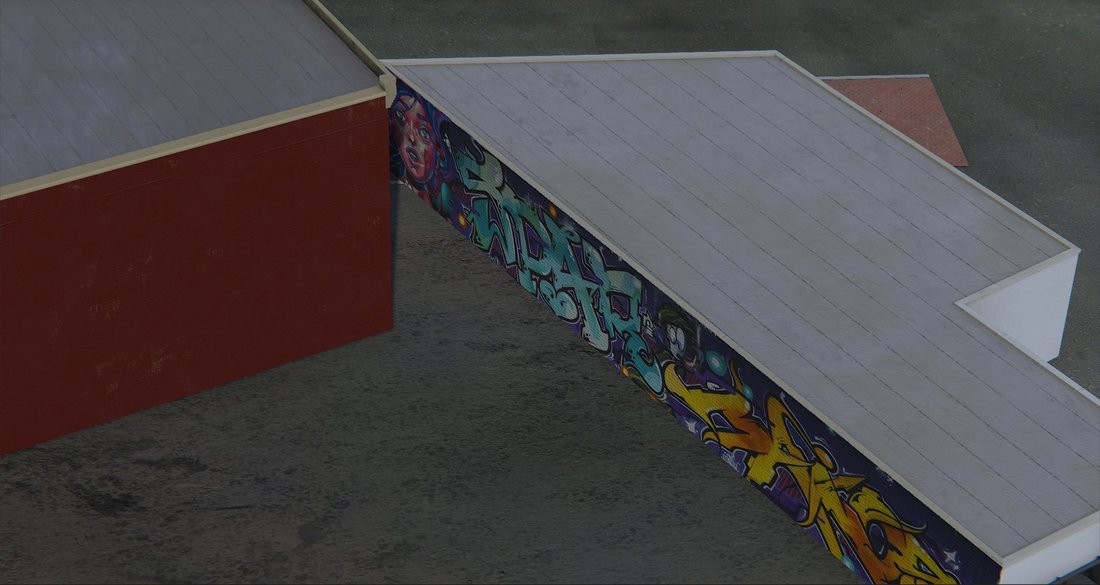
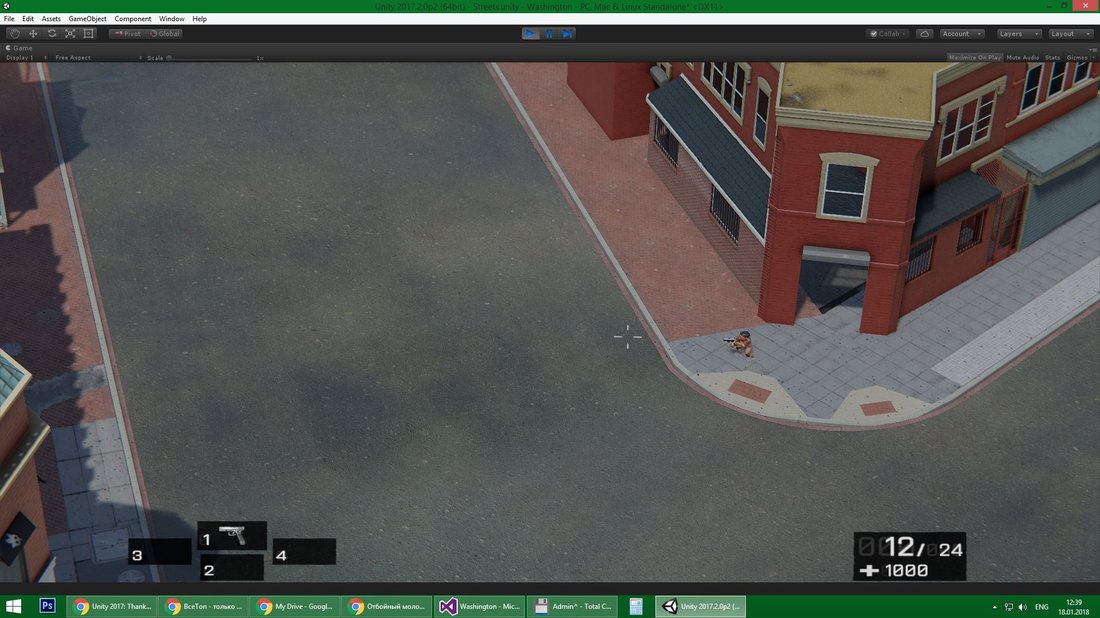
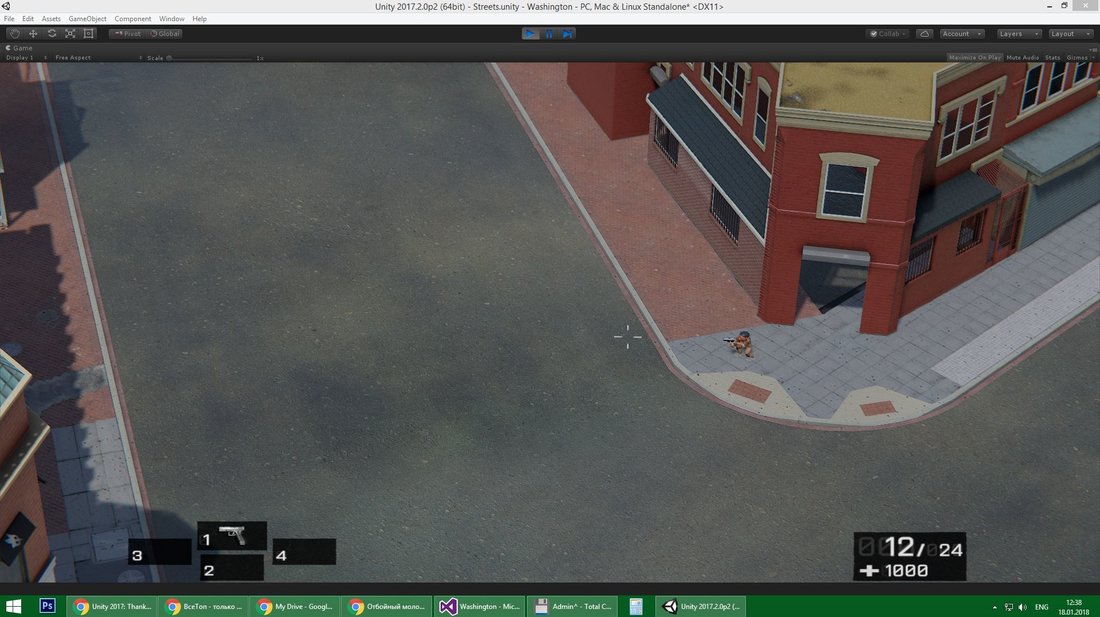
Recently I've added deferred decals into the engine and decided to test one idea I had for removing seams where buildings meet pavement. Here is how it worked out (you might want to enlarge the screenshots):

BEFORE:

zz1.thumb.jpg.b2b297f0bd9aa8405ff3c485b76e321d.jpg


AFTER:

zz2.thumb.jpg.57d17147c1bb50a010c91ec33919cf2f.jpg


BEFORE:
 

zz3.thumb.jpg.3a1f78f0709e65057e714a59225965ca.jpg


AFTER:
 

zz4.thumb.jpg.8c8e8c1d34616b6a5a7ddf423be8e79c.jpg


So I am really looking forward to your feedback. I am obviously quite inexperienced and still have a tone of stuff to learn so I would love to hear where I can improve.

omg, I've modelled and textured a lot in my years and have never made anything that comes close to as good as yours.  If this is just you 'giving it a whirl', you're doing splendidly.


Advertisement
On 1/19/2018 at 1:13 PM, cubr said:

So I am really looking forward to your feedback.

As you should, this is amazing work for your short learning experience.

There is very little to criticize:

You missed details, either to keep it low poly or to skip some work. Either way it's fine, still looks very good for the type of game your making.

9.thumb.jpg.6eae72a47f987c6f164431948ef9844e.jpg

10.thumb.jpg.e39149fdb81f0646d9df89b583e39c4e.jpg

These two images look flat. The reason is because you used over saturated colors and the AO is not showing as well as on the other images. Tone down the colors and add some dirt to the texture where the model touches the ground.

On 1/19/2018 at 1:13 PM, cubr said:

Recently I've added deferred decals into the engine and decided to test one idea I had for removing seams where buildings meet pavement. Here is how it worked out (you might want to enlarge the screenshots):

It worked a bit. In games we just add dirt to that part of the texture and you will often see that in the real world it is how it happens. You can use your AO map to do this, in fact that is how dirt works in substance.

I like your style, if you can keep everything this good looking till the end of the game it would be fantastic.

Huge thanks for your feedback! I am more than willing to learn and there is only so far I can get on self-criticism alone.
 

2 hours ago, Scouting Ninja said:

You missed details, either to keep it low poly or to skip some work. Either way it's fine, still looks very good for the type of game your making.

I am more than willing to hear where I've missed details in the geometry. My buildings are actually insanely wasteful - they sometimes contain over 10k vertices. I wanted to create smooth corners in every single place and then decided not to retopologize the models to save time (it's not long to do it once, but I am constantly iterating: discovering missing details and rebuilding the model, so it would have hurt me to retopologize every time). The reason why I believe I might get away with it is because the screenshots show the actual scope of the game - the player will roughly see nothing but a few buildings and a road. Unity docs say that you should strive to have under 200k vertices per frame and my humble calculations show that I should fit in. So yeah please do tell me more, I would love to know which details are noticeably missing.


2 hours ago, Scouting Ninja said:

These two images look flat. The reason is because you used over saturated colors and the AO is not showing as well as on the other images. Tone down the colors and add some dirt to the texture where the model touches the ground.

You've spotted the weakest part of my town :). Those buildings alongside the tall one to the right of them were haphazardly made with pre-existing materials and little polishing to save time and because I was quite fed up with making buildings at the time. However, once I assembled them together in one place I realized, that they really look significantly worse than the rest and I just can't stand that. I am planning to improve them significantly.

You were also right that they were overly saturated - desaturation was the first thing I did and models started looking better immediately. However, there was another huge misstep I did with the level - I used a bad skybox. It had a huge field of lavish green corn plants in it and a blue sky. I recently changed it for a city skybox and things immediately started looking miles better.


So again, please do tell me everything that worries you when you see the screenshots. I really need your feedback!

13 hours ago, Awoken said:

omg, I've modelled and textured a lot in my years and have never made anything that comes close to as good as yours.  If this is just you 'giving it a whirl', you're doing splendidly.


Thanks for your kind words. You should try using Substance Painter it is an incredible tool and I would never have been able to even come close to doing something like this if not for this app. Keep in mind that this is only hard surface modeling which is quite a basic modeling task. And when I textured I had a huge library of photorealistic materials available for me, so it's not like I became an artist in half a year (I would not be able to model and texture a character, for instance) my work only proves that with modern software anyone nowadays can make amazing graphics if they invest enough time and passion.

12 hours ago, Scouting Ninja said:

It worked a bit. In games we just add dirt to that part of the texture and you will often see that in the real world it is how it happens. You can use your AO map to do this, in fact that is how dirt works in substance.

Well, this approach still leaves a visible straight line which sticks out as a sore thumb, especially where there is a sharp contrast between the color of the ground and the color of the wall. With decals I can actually create uneven lines. But yeah dirt is one way to achieve this.

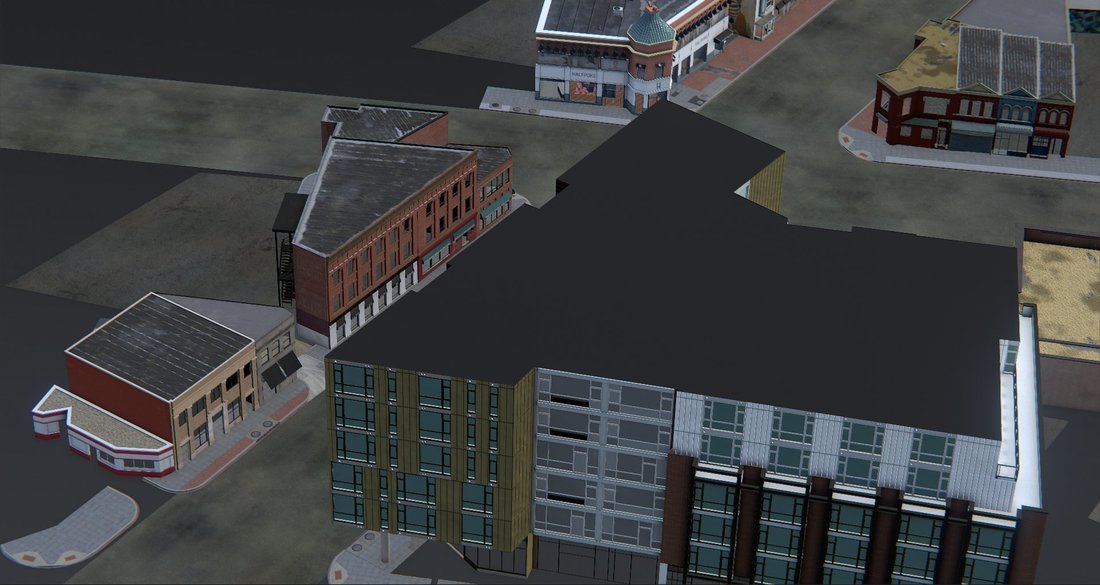
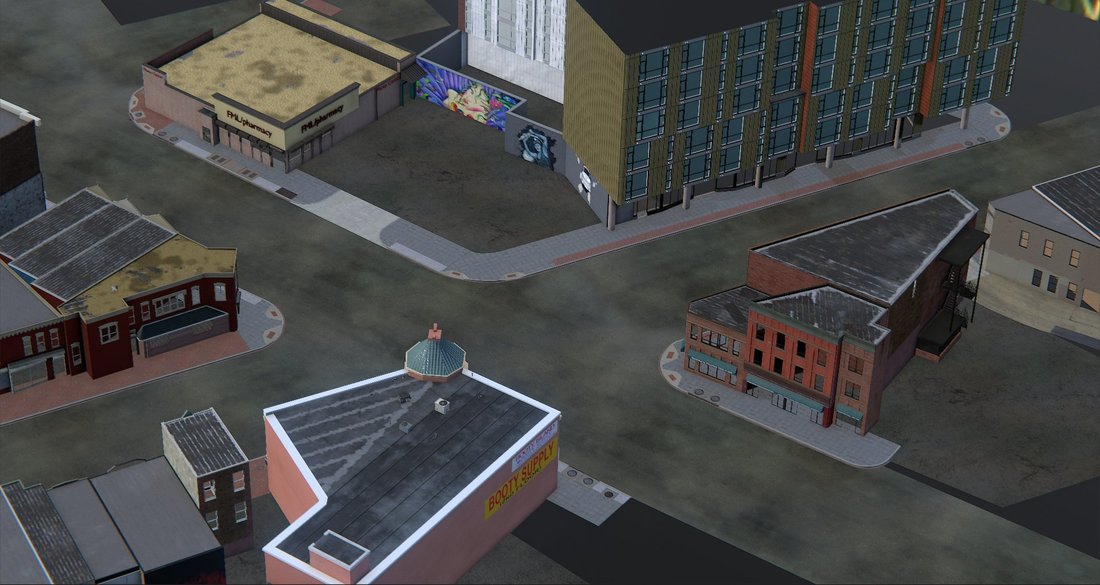
Here are the screenshots with a few improvements (enlarge them, images are huge!):

screen_7680x4800_2018-02-02_18-24-23.thumb.jpg.8b98992ada56e5db96b6c3d61ffb9384.jpgscreen_7680x4800_2018-02-02_18-24-53.thumb.jpg.41ebc55093644b16c0cc89df4561133e.jpg

Advertisement
3 hours ago, cubr said:

Well, this approach still leaves a visible straight line which sticks out as a sore thumb, especially where there is a sharp contrast between the color of the ground and the color of the wall.

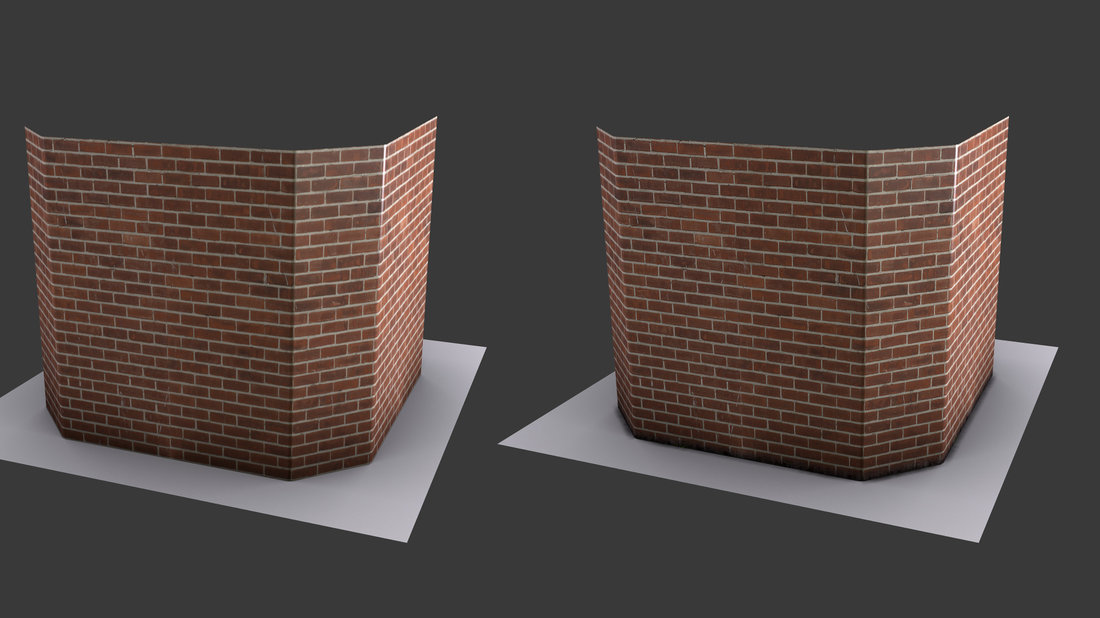
Sorry I should have shown some images, but I am working late so I only have my old laptop with me. I used Blender and Gimp with images I quickly found on the net.

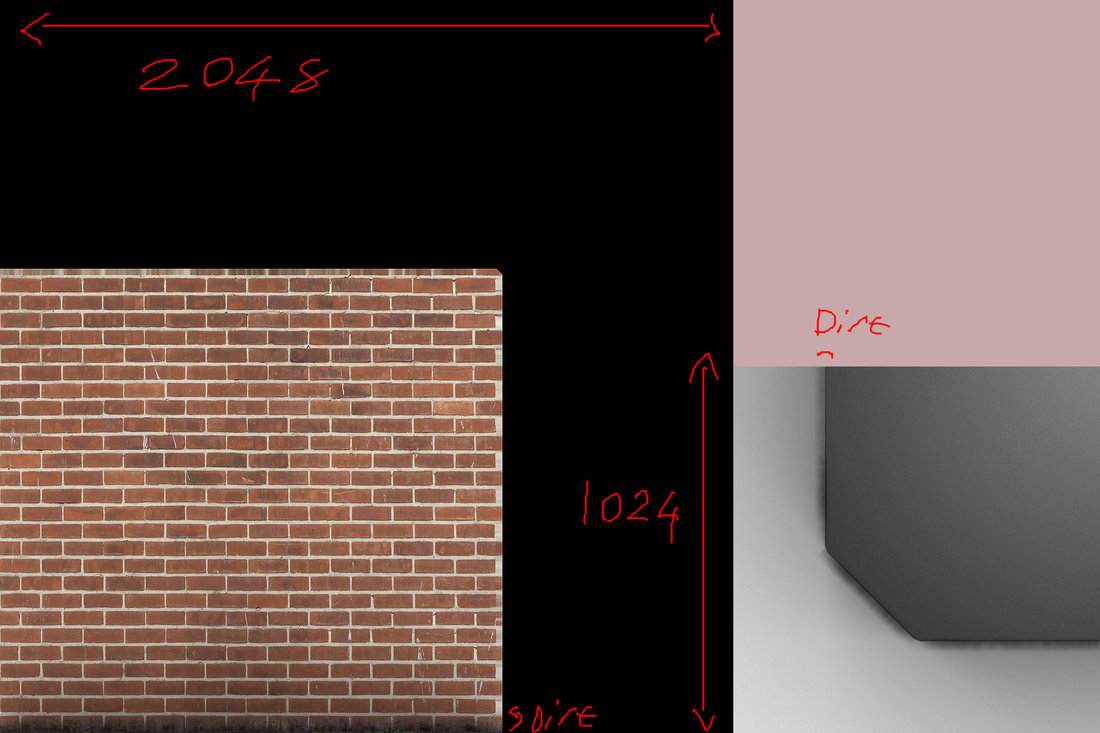
Wall.thumb.jpg.cefba748cde79574f314c745fad47faf.jpg

On the left is plain, on the right is with dirt.

As you can see this is in Blender with no shadows, it will even look better in a BPR engine. Only Albedo and AO maps where used.

This is the texture with the AO over the Albedo:

Dirt.thumb.jpg.0aa57f88397c7729b5ea62461a929f72.jpg

12 hours ago, cubr said:

I wanted to create smooth corners in every single place and then decided not to

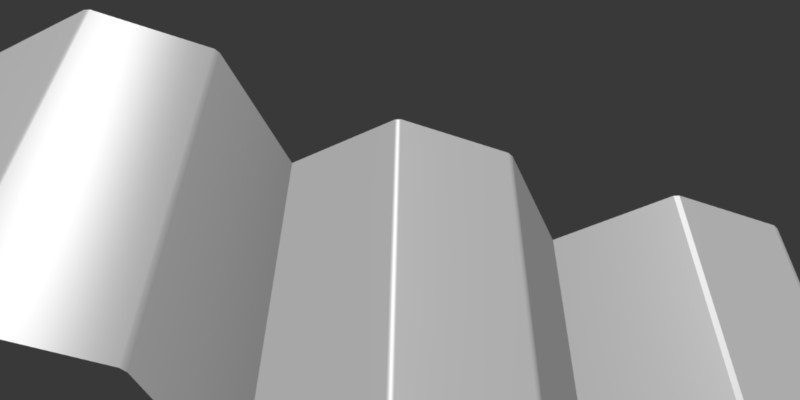
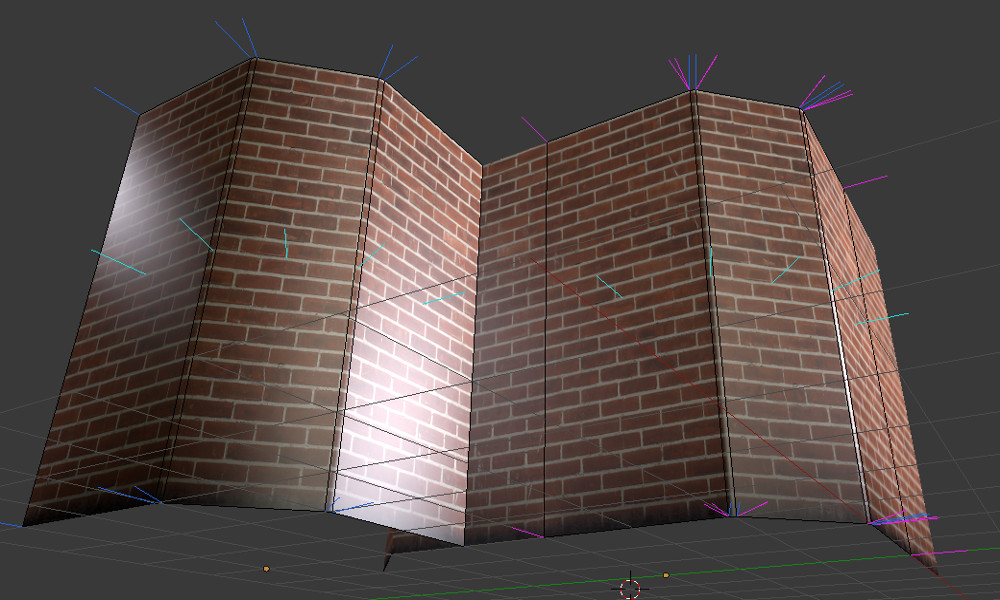
As you can see I have nice bevel edges here, not only that they are very low poly.

BakedNormal.jpg.656ead3b10e4dabcd1dfa16322dd01bb.jpg

As you can see the left is too smooth. The middle is correct and the last one is too hard.

This wasn't achieved with a normal map, instead I baked the normals of a mesh with the bevel I wanted into my low poly mesh.

Normals.jpg.b263acbe2d85f082fa018c58afe065b8.jpg

The colored lines show the normals. The left is how blender smooths, the right is my custom normals to get the bevel I want, same poly count but not the same vertex count.

It's OK to split vertices to do this, because your normal map and smooth groups also split vertices like this. This is common for buildings. You can also see my wall was made to tile, although I did rush it.


To learn how to bake normals into your mesh you can just watch this: https://www.youtube.com/watch?v=oAGEGBulzSU 

The only mistake in that video is that the artist says it's a new trick, this is in fact an old trick. It was how normals where baked before pixel shaders. We still use this and many old tricks.


This is why we make our textures tile: http://polycount.com/discussion/144838/ue4-modular-building-set-breakdown it's a better way to work on large projects.

This is how we do it in games normally: https://www.youtube.com/watch?v=xmJnE2kn4v0 there have been some changes. We for example use software like Quixel and substance to make better tiling textures; no longer just using the photos. I think I like your way more.


Mostly continue as you are doing now, you will get to the other parts as you need it.

12 hours ago, cubr said:

You've spotted the weakest part of my town :)

Some advice for building a portfolio.

Don't ever include these lower quality ones in your portfolio, they make the other work also look lower quality. It's better to have a few good images, instead of a lot of images with some of them lower quality.


Honestly you did amazing work. I would like to say you have real talent but I know this was practice and hard work, not some magic you where born with. 

33 minutes ago, Scouting Ninja said:

On the left is plain, on the right is with dirt.

As you can see this is in Blender with no shadows, it will even look better in a BPR engine. Only Albedo and AO maps where used.

1) It looks like your AO is spreading from the building down to the ground it stands on. In my level I have the ground and the building as two separate models that can be mixed and matched differently I can't imagine how I can spread AO this way in every case.

2) In Unity, whenever there is direct light ray falling on an object - there is no or very little AO, I think this is quite correct. This means that your system completely breaks when a light source is shining on an object.

3) This creates blurry dark lines near the edges of buildings and I am not a big fan of overemphasized ao. It makes the final image look dirty.


37 minutes ago, Scouting Ninja said:

To learn how to bake normals into your mesh you can just watch this:

This is some INSANELY useful stuff man! My mind is obliterated! Thanks a TONE! Now I have a weak worth of studying and practice!


40 minutes ago, Scouting Ninja said:

This is why we make our textures tile:

Yeah, there is clearly no way to create that large of a model without tiling portions of it. I actually had a similar situation with the largest building in my scene - most of it's walls are actually covered with a tiled 1024x1024 texture. But yeah with my game setup I am the lucky one in the fact that I can just use 4k textures for large buildings and get away with it :).


43 minutes ago, Scouting Ninja said:

I think I like your way more.

If you mean Substance Painter - do give it a try. I can't really even express how much power this tool provides. I can create next to any shape by just playing with shapes. For this whole scene I hardly painted a thing (graffities were taken from royalty-free web sites).


46 minutes ago, Scouting Ninja said:

Some advice for building a portfolio.

I would hardly ever be building an art portfolio. Truth is I am a much better coder than artist, so if I would ever have to seek work in gaming industry I would search for a coder's position. Hopefully I will make mah own game, it will sell and I would just be happy this way :).


I cannot thank you enough for your feedback! This was incredibly useful!

24 minutes ago, cubr said:

1) It looks like your AO is spreading from the building down to the ground it stands on. In my level I have the ground and the building as two separate models that can be mixed and matched differently I can't imagine how I can spread AO this way in every case.

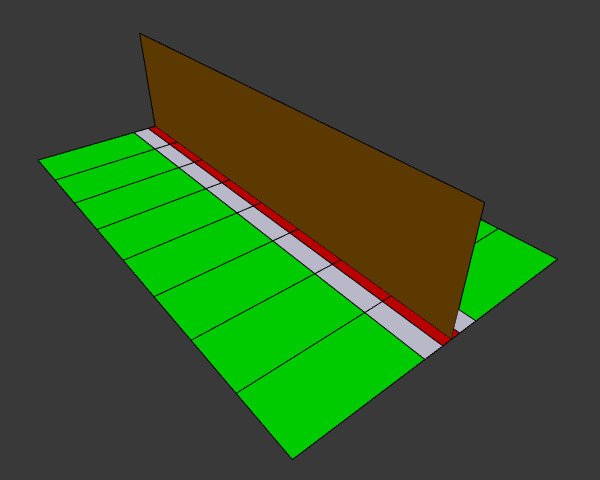
The way would be to use a tiling texture. Something like this:

ModularAO.jpg.9999ef5d4048afb6d6566496e97fdc4a.jpg

The red will be your AO. The white block is that small piece of the texture and the green is what you already have. You can just keep using the tile over and over or map it to a single plain.
24 minutes ago, cubr said:

3) This creates blurry dark lines near the edges of buildings and I am not a big fan of overemphasized ao. It makes the final image look dirty.

This is because it's screen space AO. The AO I used here is baked as a texture. If your ray is set to a high value it will looks smooth.
24 minutes ago, cubr said:

If you mean Substance Painter - do give it a try.

I actually do use it at home. At work we use Quixel. With that said I like Substance designer more as it works more like Photoshop, I learned to texture the old fashioned way.


What I meant is that 3D modelers are trained to use modular work flow to make buildings. Your way isn't modular, instead your making every building as one object, like how I would make a vase or any other single object model, it looks nice.

24 minutes ago, cubr said:

Truth is I am a much better coder than artist

Wow, I am stunned. This is amazing work, maybe just slip it in as a extra in your portfolio.:D

3 hours ago, Scouting Ninja said:

This is amazing work, maybe just slip it in as a extra in your portfolio.:D

Yeah if I had a choice between two equal game programmers, but one had demonstrated an understanding and appreciation of game art production techniques and the other hadn't, that would make a big difference :D

This topic is closed to new replies.

Advertisement